What's new in VCarve
Brand New User Interface
Version 12 brings you a brand new modernised user interface with huge improvements to enhance your workflow and save you time. The interface has enhanced DPI scaling support, which makes the software look more vivid and sharp especially on high-resolution screens, you can access both the vector and component tools from one panel, so you don’t have to toggle between them and you can use the drawing and 3D tools without changing tabs, reducing mouse miles and saving you time.
Sketch Carving
Sketch Carving is a brand new feature that converts a high quality image or 3D model into a VCarve toolpath. The resulting toolpaths are quicker to machine than a 3D toolpath, and they produce impressive stylistic results with very little design input.
VCarve Inlay Toolpath
The new VCarve inlay toolpath makes the process of creating VCarve inlays quicker and easier. The toolpath automatically creates both the plug and pocket toolpaths, mirrors your geometry, and even puts the toolpaths on the right sheets. *VCarve Pro Only
Keep-out Zones
Keep-out Zones allow you to designate areas of your work bed the machine should avoid during rapid moves. This might be places where clamps, jigs, and fixtures could interfere with the safe running of the machine. *Pro Only
Drawing in the 3D View
You can now draw directly in the 3D view. Each tool allows you to modify key properties of shapes directly on the shape themselves using handles for easy manipulation, reducing the need for you to have to go back and forth within the forms.
Vectors in the 3D View
It is now possible to toggle the drawing of vectors in the 3D view. This is useful if you ever want to see how your geometry lines up with parts of your model or machined parts of your simulation.
Components Dropdown
You can now switch between active levels using the dropdown menu on the document toolbar. It is also possible to adjust the visibility and combine modes of levels, as well as add new levels directly from this menu. You no longer need to go to the component tree for most modelling tree operations.
Orthographic View Mode
The orthographic view removes the perspective mode on the 3D view, this is useful for when you want to see two-dimensional objects over the top of the 3D view, for example if you want to see how the parts of a toolpath look when lined up alongside the 3D view.
View Control
The view control is an interactive shape which allows you to quickly manipulate your 3D view. You can click on any of the faces to adjust the orientation of your job in the 3D space, or drag the control itself to dynamically change how you want your job to be orientated within your view.
View Toolbar
The new view toolbar allows you to quickly and easily show or hide items from your views. You can choose whether or not you want to show; vectors, bitmaps, toolpaths, keep-out zones and components, allowing you to focus on specific tools needed for your job.
Unified Import
In this release we’ve unified vector and bitmap import so you can import all of your 2D data files from one single button.
3D Interactive Help
When working in the 3D view you now have access to live help prompts where the software will track your current tool or action and provide you with handy tips on how to use the feature, whilst providing you quick access to the relevant Help documentation
Version 11.5
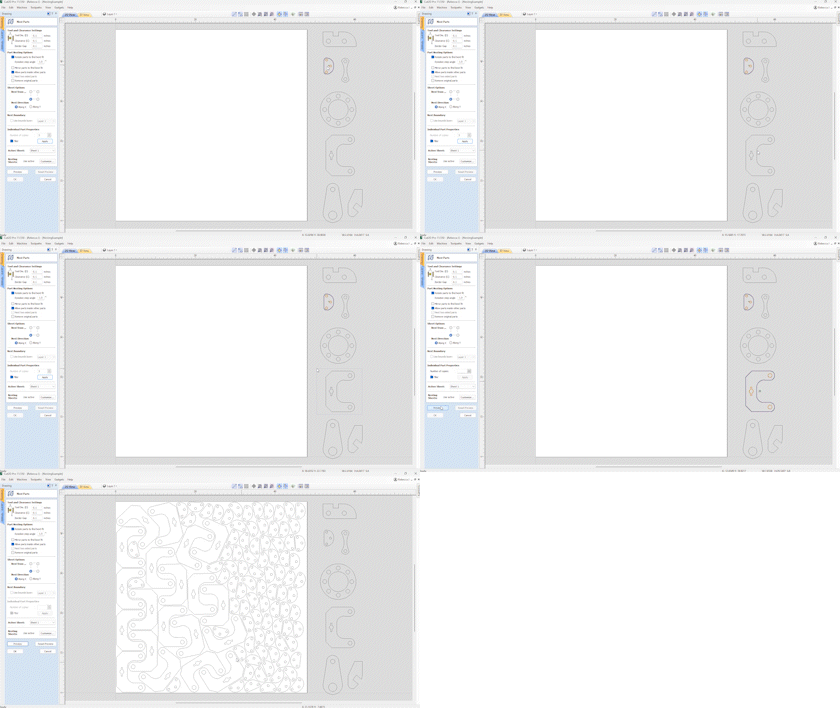
Nesting Filler Parts
There is now an option in the nesting form that allows you to fill your sheet with a given part, this is useful for scenarios where you want to fill your sheet with parts but are unsure exactly how many will fit and so the software calculates that for you. Simply mark the part as filler using the check box in the form and the software will identify the filler part with a green star in the 2D view, hit preview and see the results. You can also combine filler parts with other nested items, for example if you want to nest 20 of one part and then fill the remaining space with a filler part you can do just that. First select the part you want to nest, enter the number of copies required and press apply. Then select your filler part and mark it as 'filler' and press apply, then preview the results. You can add in further filler parts where the software will prioritize the largest filler part before moving to smaller filler parts, enabling you to maximize your material and minimize waste.
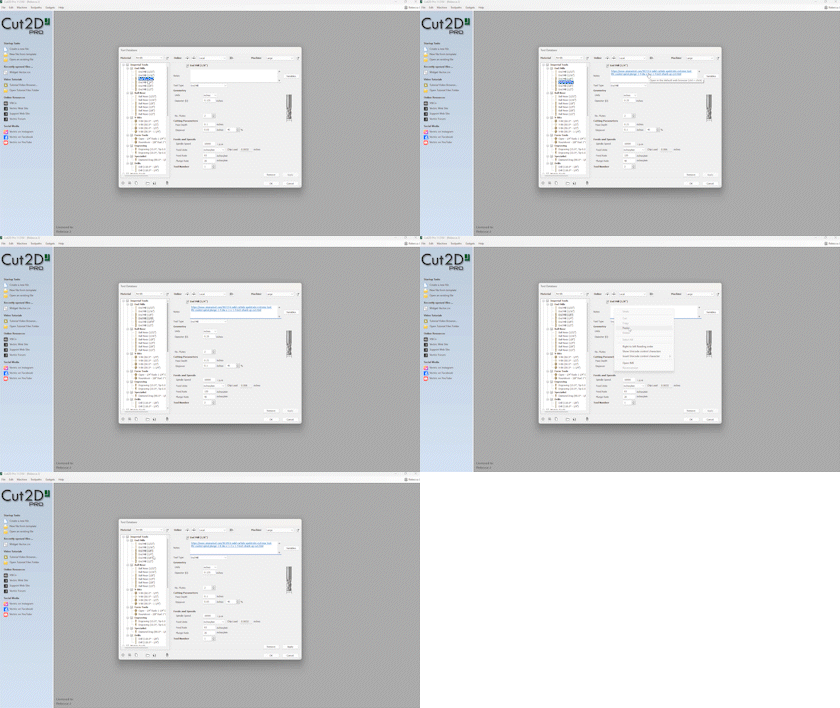
Tool Database Improvements
In the tool database you can now add clickable links in the notes field. This is perfect for adding the webpages of where your tool was originally purchased. In the tool database simply paste the link in the notes section and the software will store this information. To access the link a simple CTRL and click will take you directly to the website in your default browser.
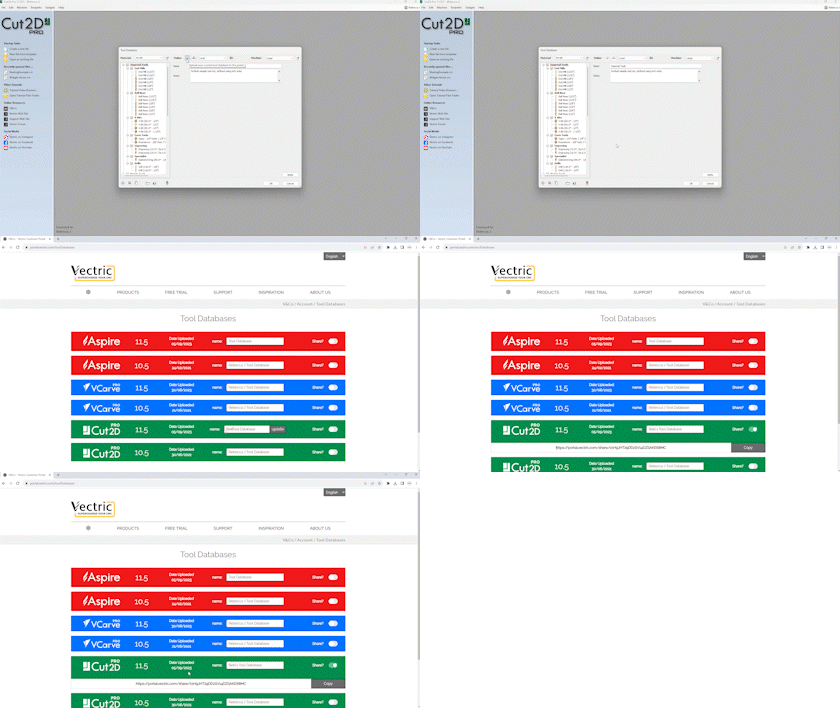
Remote Tool Database
We’ve introduced the ability to share your tool database using a link from your V&Co account. This is particularly useful for users wanting to share their tool data and settings without the end user overwriting their own database. The owner of a tool database can update their database and push newer versions that will get propagated to users who have subscribed to a database, where they will be notified in the tool database form that an updated version is available.
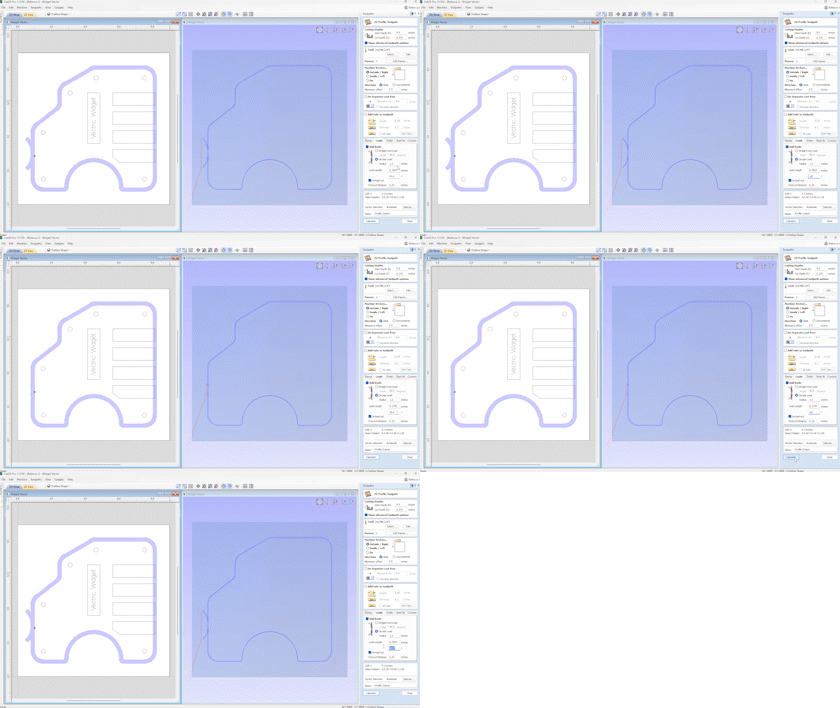
Define Circular Leads By Angle
When using circular leads in the profile toolpath you can now lead onto the edge of the part at a specified angle without having to guess the distance. It’s worth noting that the maximum angle will be capped at 90 degrees.
Pre-populated File Templates
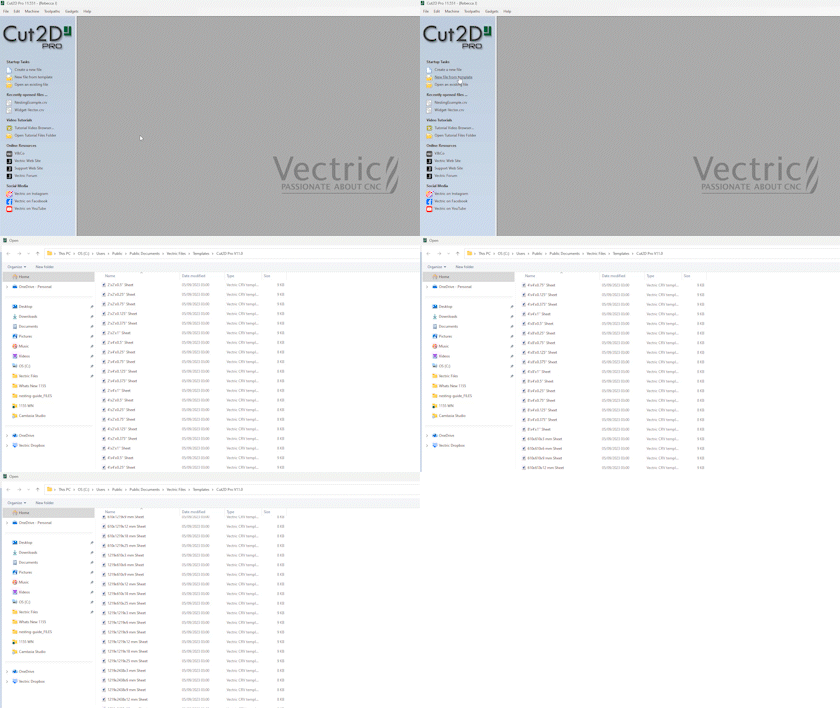
We’ve included a set of predefined templates based on standard industry sheet sizes and thicknesses, all of which can be accessed through the Vectric files folder. Simply open a new template, choose your desired sheet and off you go.
New Laser Overscan Functionality
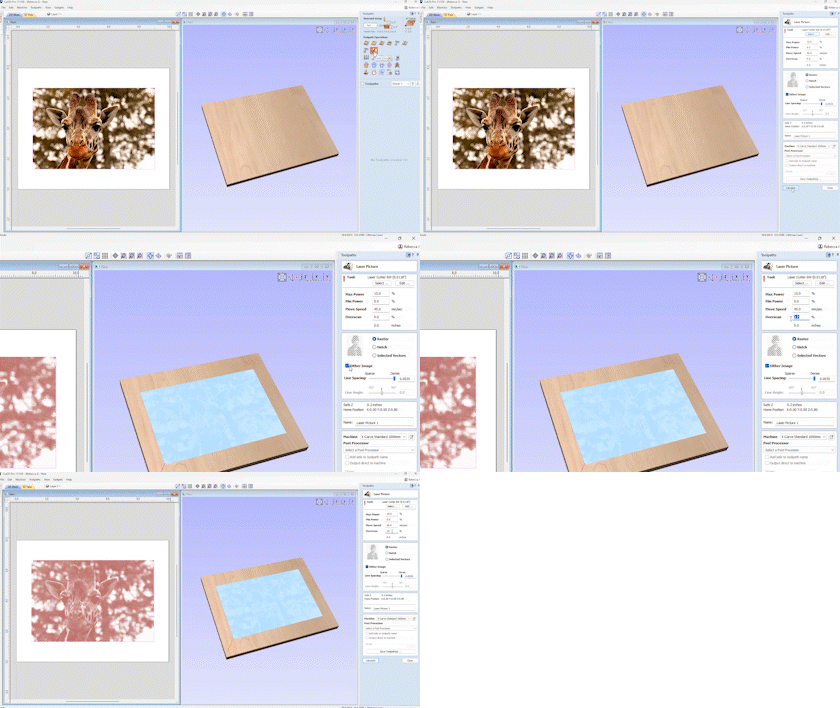
We’ve made improvements to the way in which we handle the laser output when using the laser picture toolpath and the hatch fill strategy in the laser cut and fill toolpath. The new over scan field ensures that the laser head runs past the edge of the picture or hatch at a percentage that you can set in the form, by doing this it will help eliminate any overburn that may be visible by turning the laser off exactly at the end of the picture or hash line, whilst the machine over scans at a given percentage. *Please note: the add on laser module is required for this enhancement
New Laser Geometry Selector & Toolpath Templates
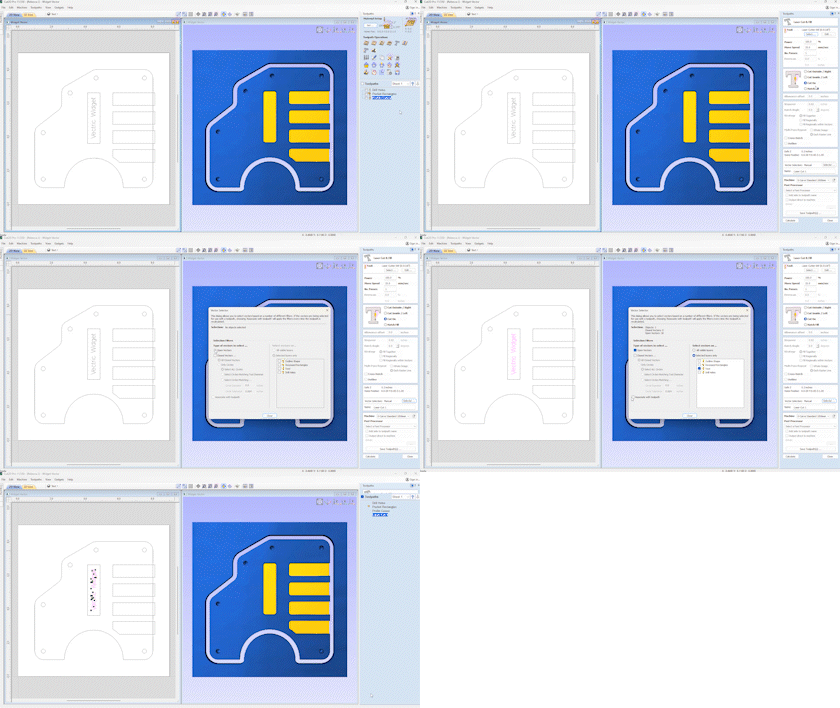
We have included the vector selector option in the laser cut and fill toolpath allowing you to select vectors based on filters that you set in the vector selector dialogue, this also opens up the opportunity for the saving and loading of toolpath templates with laser projects. *Please note: the add on laser module is required for this enhancement
3D View Visual Improvements
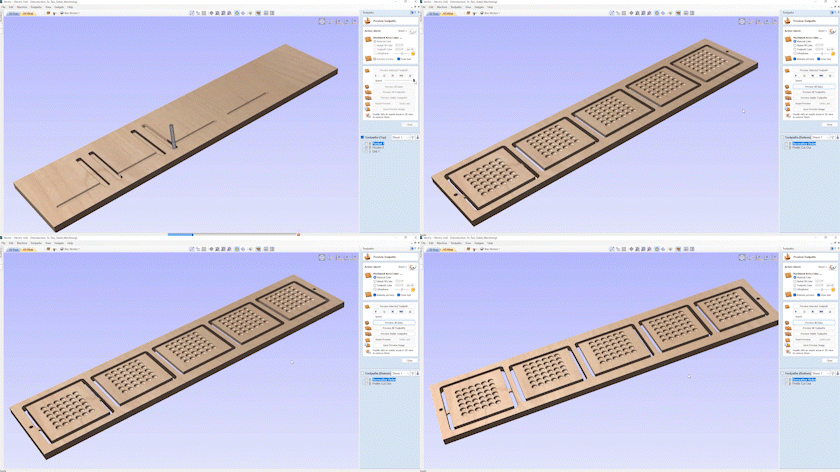
The power of graphics hardware has increased dramatically in recent years. To make full use of this resource whenever it is available we have completely rebuilt the 3D rendering infrastructure across all the products in our v11.5 range. The result is the smoothest, highest detail, 3D View ever. Toolpath previews draw faster and with more clarity. The 3D material block can be viewed and manipulated dynamically while toolpath cutting is simulated, even in higher resolutions. Improved lighting and shading techniques in the 3D view provide consistent visual shape and depth cues whether working on single-sided or double-sided projects. Any recent computer or hardware (less than five years old) will show a serious step-up in 3D performance when running v11.5. But our extensive testing shows that even older hardware will benefit. We have ensured that there is a robust, but slower, fall-back mechanism for outdated or incompatible graphics cards but it is essential in all cases that your graphics card drivers are up-to-date. Please visit your computer or graphics card manufacturer’s website for specific guidance on getting the latest drivers for your hardware.
Freehand Drawing Tool
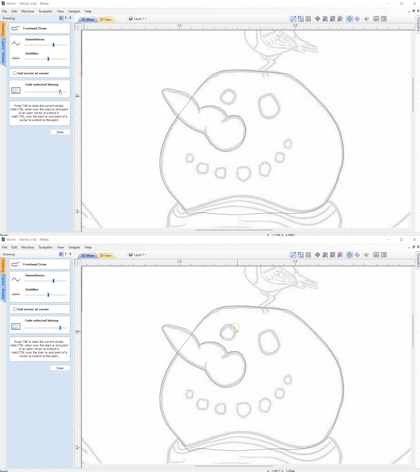
In this release we have introduced a brand new freehand drawing tool, which closely mimics the flow of drawing with a physical pencil. Allowing you to create quick sketches and trace organic shapes much more easily. Within the form there are various options to control the drawing. The smoothness setting helps with the post smoothing of your vectors and the stabilization setting helps to stabilize the cursor for a more accurate drawing. Within the form we have also included the ability to adjust the fading of your bitmap, saving you the hassle of having to exit the tool to make changes to the bitmap ready for tracing.
Select Duplicates
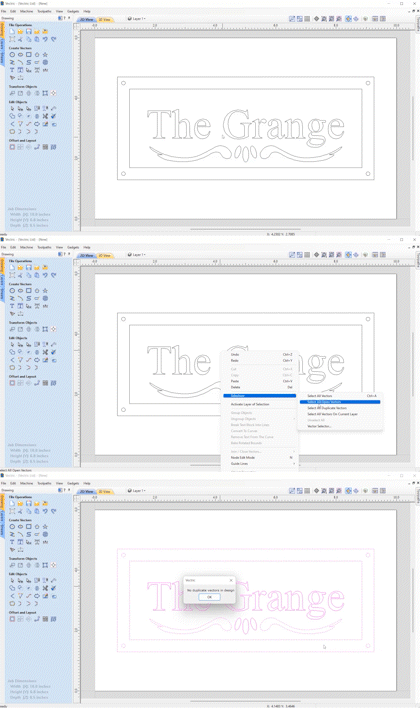
The software now has the ability to identify and select duplicate groups and text entities in your file. Making it much easier to clean up duplications ready for use with other features in the software.
Simulation
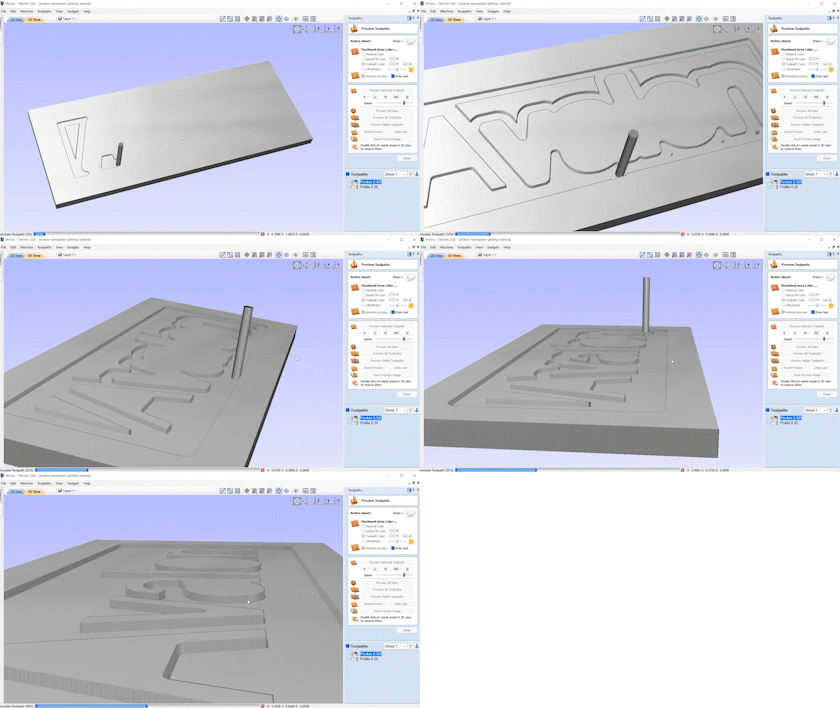
When simulating a toolpath the camera can be twiddled around and zoomed in while the simulation is running and animating to allow focus onto areas of interest, ensuring for better visibility of your toolpath moves.
Toolpath Calculation Speed Improvements
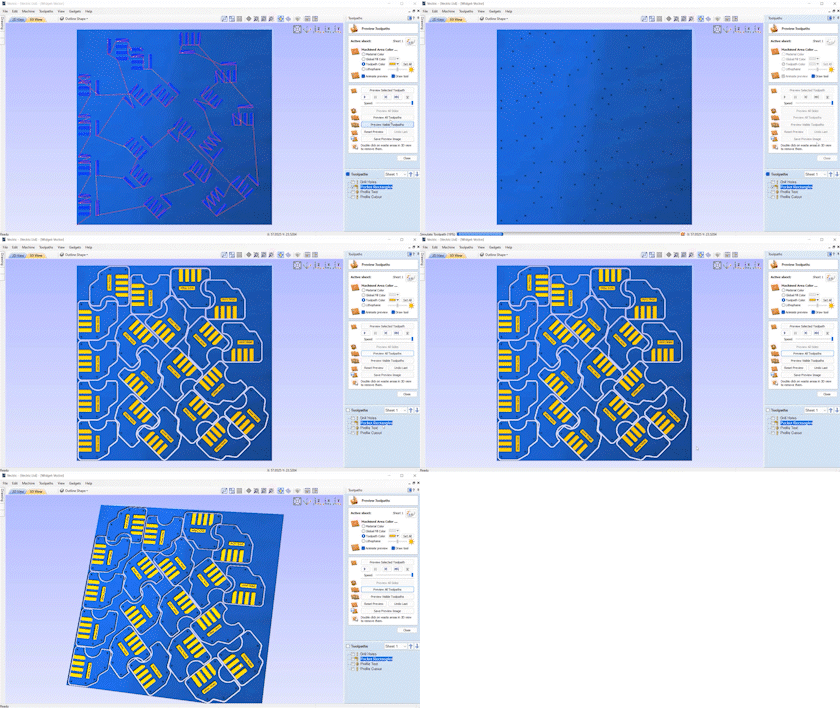
We’re making better use of the CPU cores in some parts of the pocket toolpath calculation, noticeably in toolpaths with lots of vectors. This results in speeds up to 2x faster in some cases.
Custom Variables in Tool Geometry in the Tool Database
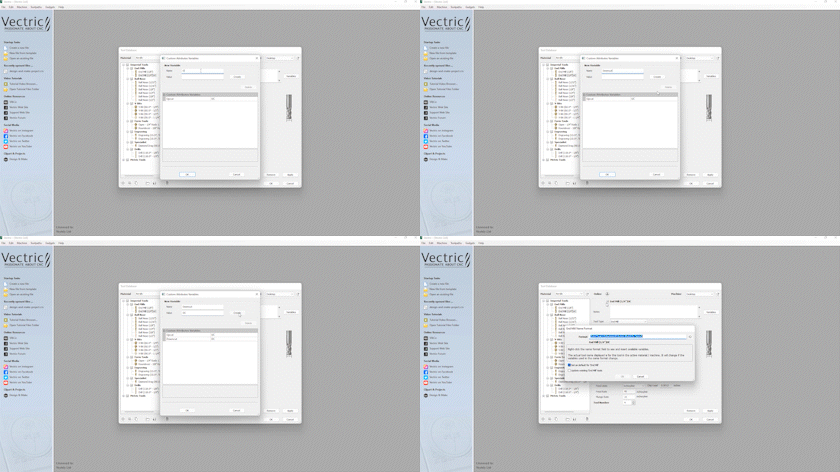
Variables can be defined for the tool geometry in the tool database which can then be used in the tools’ naming format. The custom variables are accessible through the tool database ‘variables’ button for each tool geometry. It can then be used in the name format dialog either through using the handy drop-down menu or by typing the variable manually. This is particularly useful for distinguishing between tools with exact geometry, or adding further information to the tool that otherwise isn’t specified by our default tool database format. For example you could add variables that could pay reference to specifics such as the manufacturer, coating or whether your tool is an up-cut or a down-cut, giving you more options to organize your tool database.
Machine & Toolpath Menu
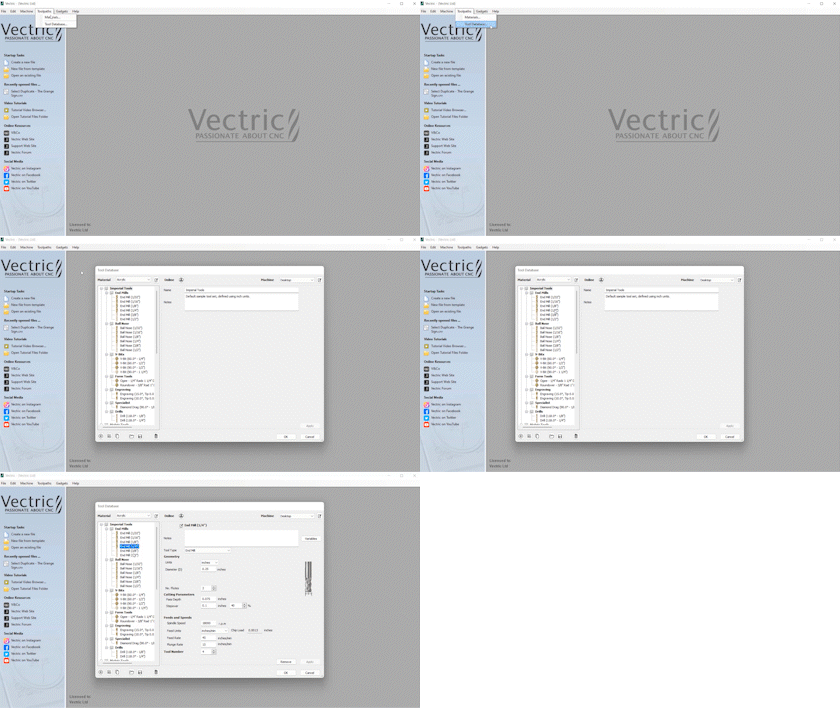
The machine menu and part of the toolpath menu has been made available without having any projects open to allow the tool database to be accessible, without having to open or create a new file.
Opening of Vectric and Third Party Data/Vector Files
You are now able to open various file formats directly into the software, without the need to have the software open to begin with. Simply double click on the file, use CTRL + O or drag the file into the software. The file formats that can be opened directly include V3D, PVC, SKP and SVG with images. To ensure that your file type will always open with our software simply right click on the file and head over to the properties, here you can choose what program you wish to open this file type with, simply select your Vectric product and going forward windows will always open this filetype in our software.
Support Reading SVG Files That Contain Images
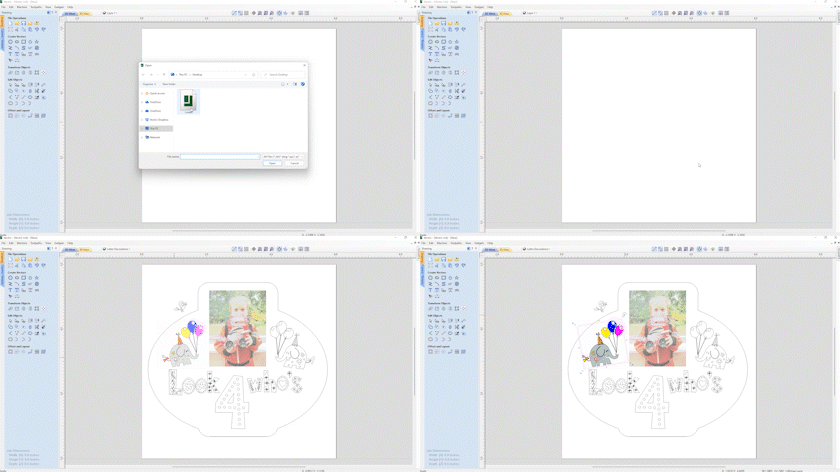
The software now has the ability to read image data within SVG files, ensuring that you get everything you need from the original file source.
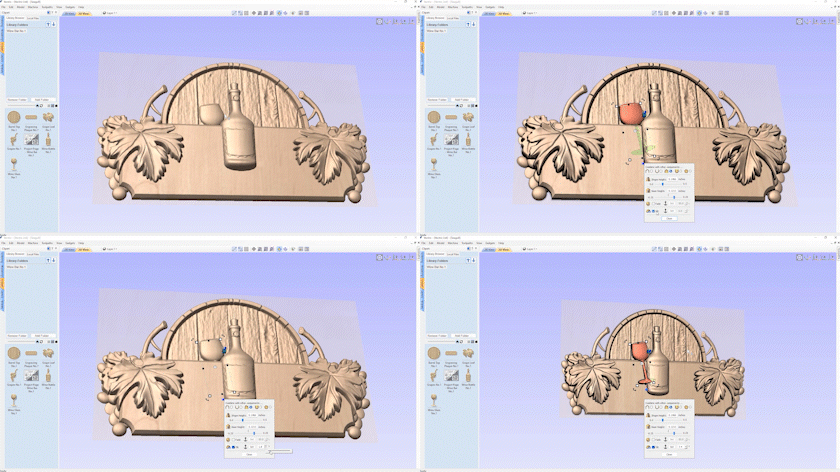
Live Manipulation of Components in the 3D View
In this release we have made it much easier to manipulate and see the result of positioning, scaling and rotating your 3D components in the 3D view. Where components can be picked up and dragged whilst showing the final result of the composite model in real time. We've also made it easier to adjust the base or shape height of a component by pulling on the drag handles. The base height handle can also be double clicked to reset the base height to zero. The live updates extend out to the tilt and fade functionality too. These improvements to the way we alter our 3D parts in the 3D view ensures a quicker and more intuitive approach to making those fine adjustments to your composite model.
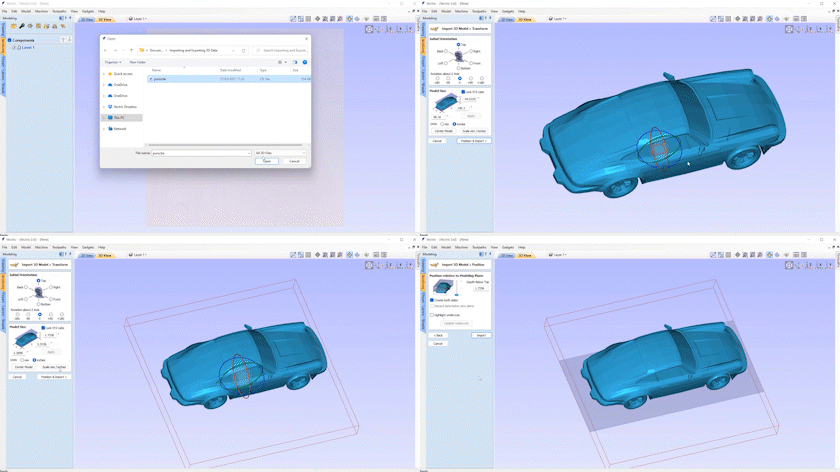
STL Import Speed Improvement
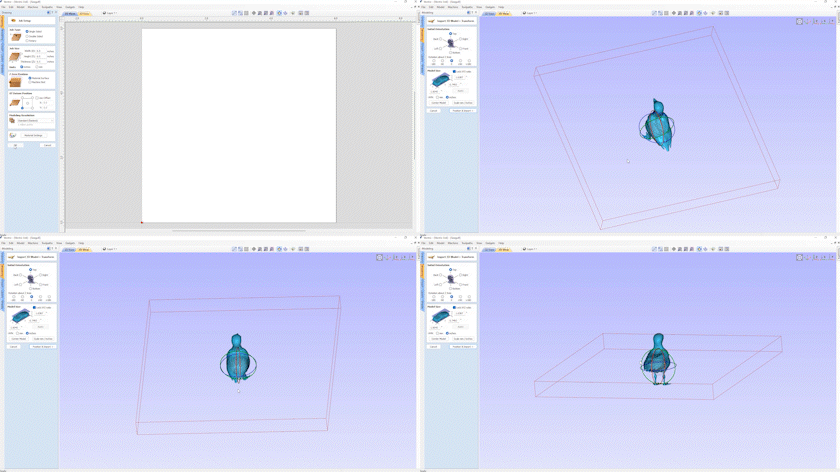
We have made improvements to the speed at which some 3D models will import into the software, this will become more noticeable on larger models, where import times will be considerably faster.
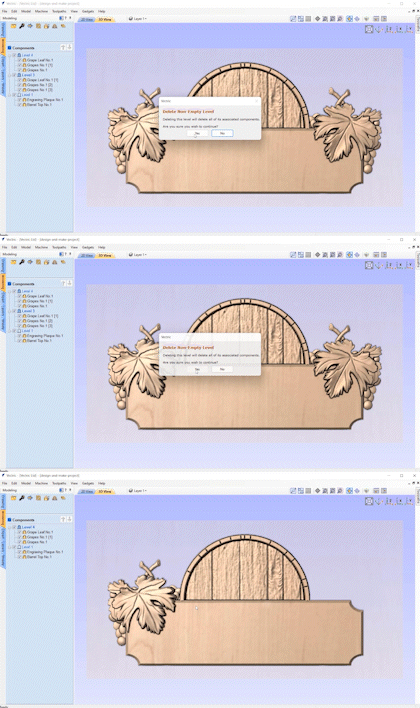
Level Deletion
It is now possible to delete levels that contain components, where in previous versions the level had to be empty before you were able to delete them, making it a much easier process to remove unwanted 3D objects in your component tree.
Version 11
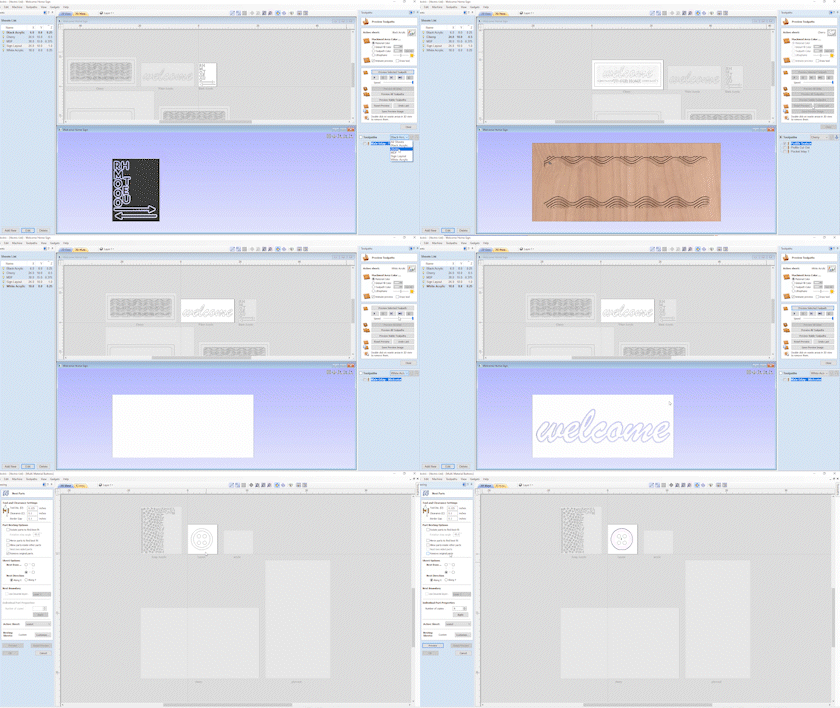
Multi Sheet Support
We have introduced the concept of sheet creation and management to organize your work, where you can create sheets yourself and control them through the sheet management tab. Each sheet can have it's own dimensions and settings, making it an ideal solution for when you are working on a project that requires multiple materials. The new sheets tab lists all of the current sheets and allows you to create, update and delete them. You can create sheets of different sizes and thicknesses as well as having the ability to control the material appearance for each sheet to better visualize your toolpaths as part of the overall project. All sheets within a project can be managed individually or collectively, making it simple to resize or update a specific selection of sheets.
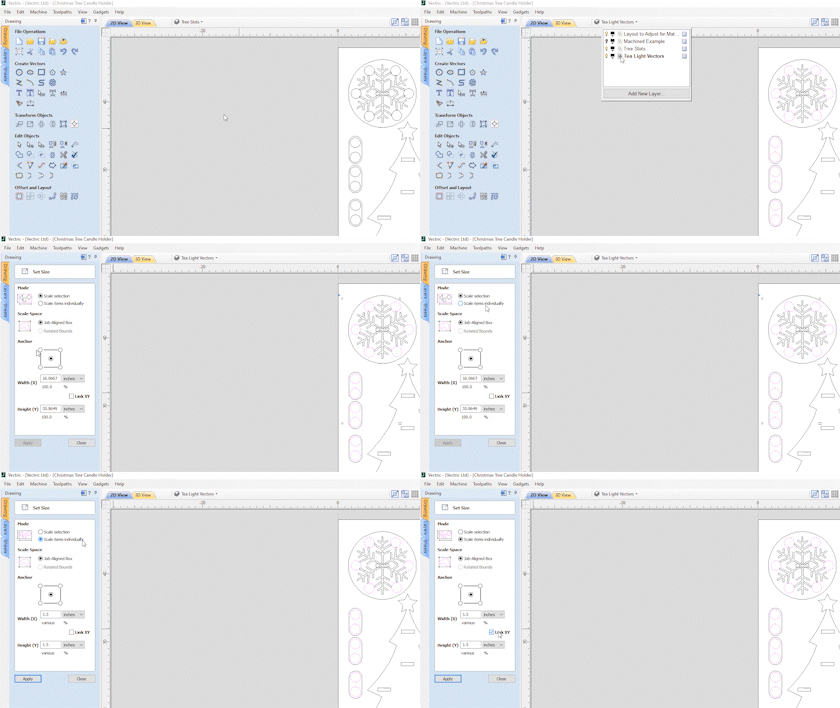
Resize Vectors Individually
We’ve introduced a new option in the set size tool to allow you to resize vectors within a selection on an individual basis. Allowing you to resize multiple vectors to a specified value or percentage, which would be useful for projects where geometry requires specific size changes e.g slots and circles.
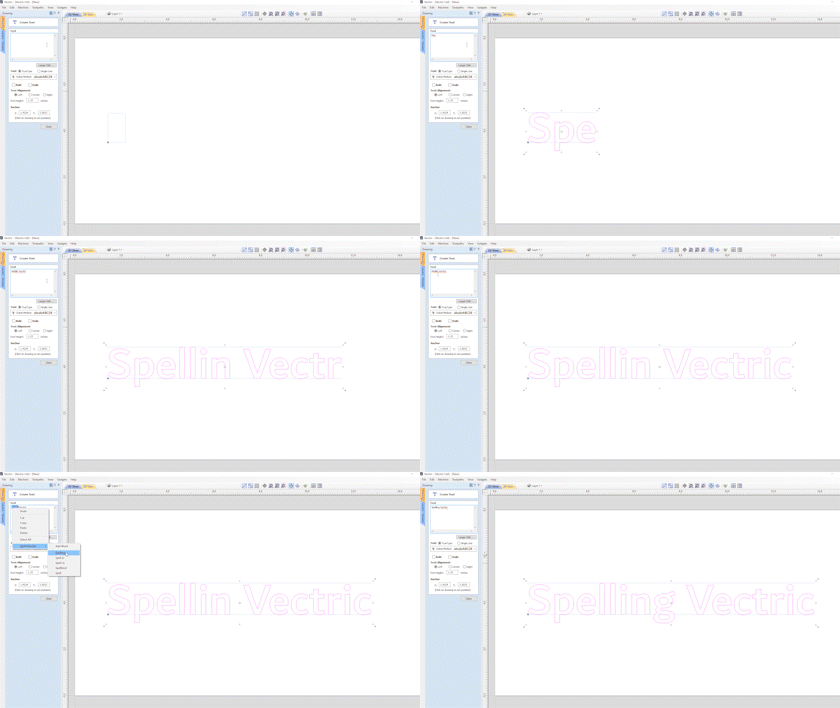
Spell Checker
In various text entry fields within the software spelling errors will be underlined in red, where you can locate the correct spelling from the right click menu to automatically replace the incorrect word, with the ability to add words to the software’s dictionary too! Ensuring that the software corrects you before you notice the mistake whilst machining!
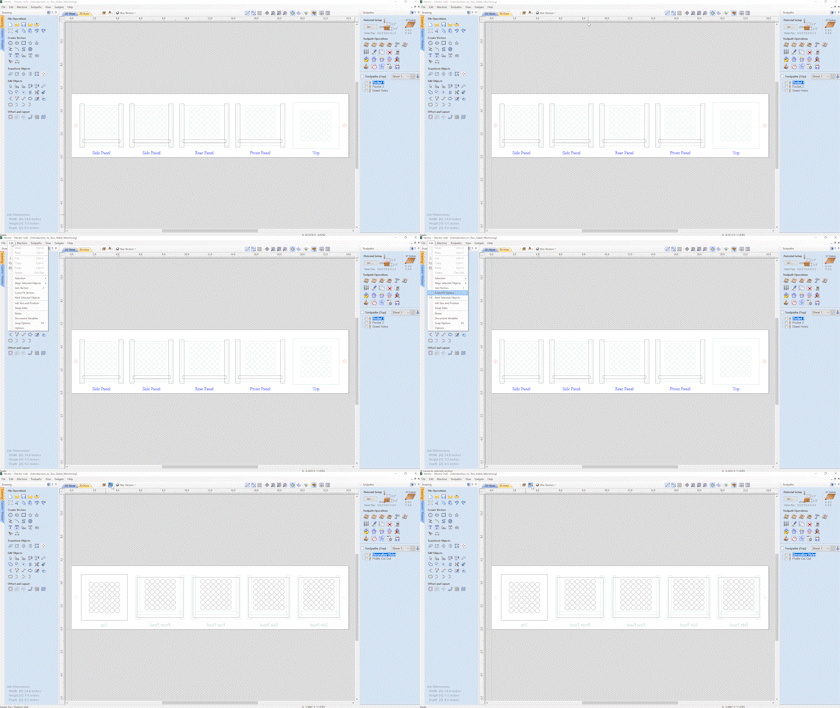
Swap Sides in Two-sided Jobs
When working in a two sided project you can now take advantage of the new option to swap sides from within the edit menu, where the software will swap all of the content that is on one side to the other.
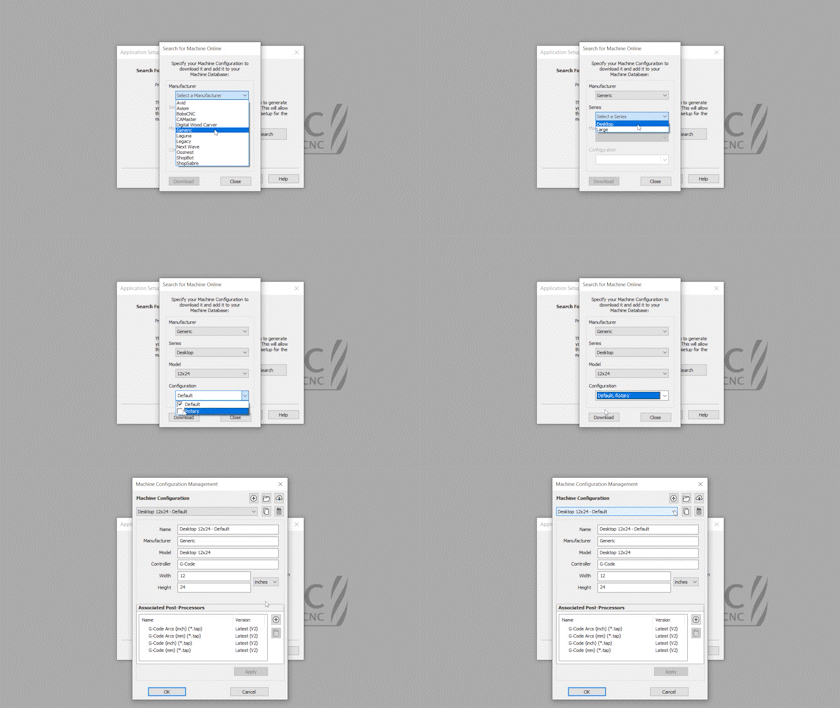
Online Post Processor and Machine Management
V11 significantly improves the management of your CNC machine, its capabilities (for example rotary or laser add-ons), associated post-processors and default tool cutting feeds and speeds for a selection of materials. As always our software is fully customizable for those who want to have full, low-level, control but Vectric's new 'Kickstarter' wizard can also help you get started with a set of tools with reasonable initial settings using our constantly updated online list of the most common machine brands and models. The ‘Kickstarter’ wizard not only ensures that you have the right post-processors and machine configurations straight-away, but the new management system also allows you to optionally stay up to date if relevant newer post-processors for your machine are released in the future all from within the software.
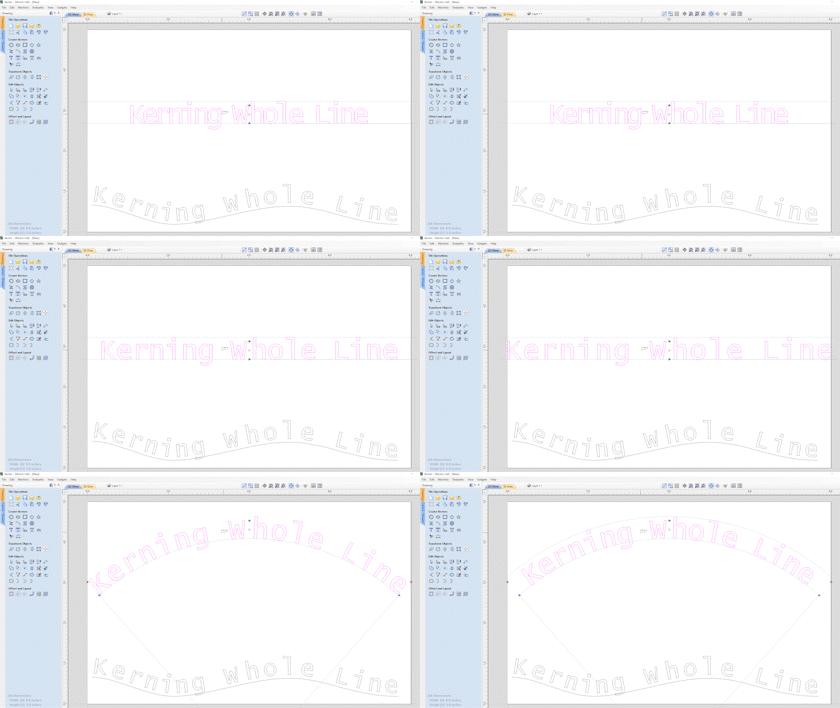
Text Kerning - Whole Line
When using the edit text spacing tool you can now adjust the spacing between all characters for the entire line in one go. To do this simply press the Alt key whilst clicking with the left mouse button, this will bring all the characters in the line closer together, and to increase the spacing simply hold Shift & Alt whilst clicking. This spacing also works for whole line text that is on an arc or aligned to curves in your projects. This enhancement makes it quicker and easier to kern all of the characters all at the click of a button.
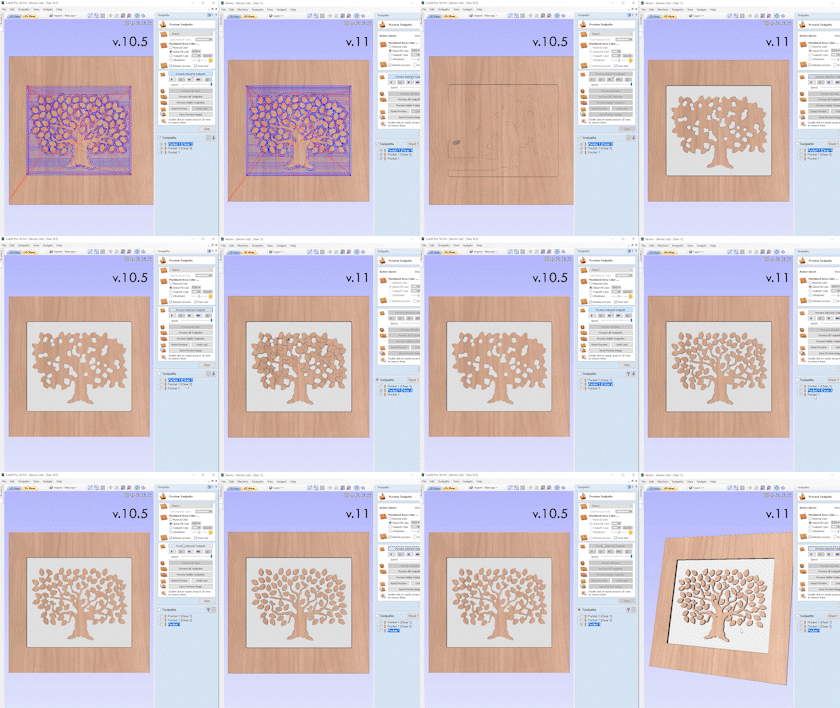
Pocket Rest Machining Time
When pocketing regions using multiple tools, the software is now much more likely to skip the areas that have been machined with the larger tools. This helps to ensure that we don’t cut more than we need to and the smaller tools only machine away in places the larger tool could not get to, helping to reduce tool breakage and in some cases this will result in faster machining times.
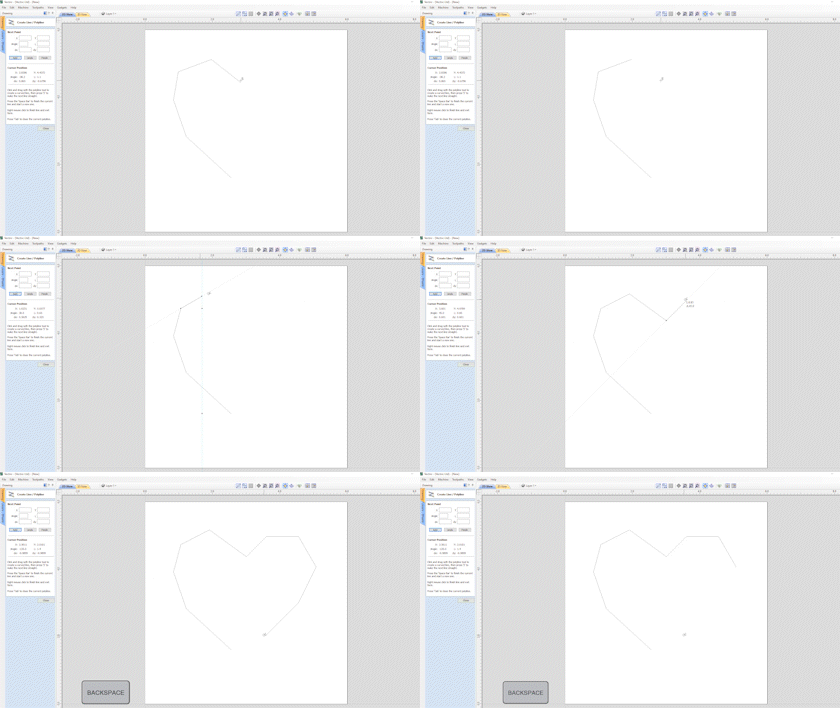
Undo Polyline & Draw Curve
When creating vectors using the polyline and draw curve tool you can take advantage of the undo shortcut to be able to easily undo the last span.
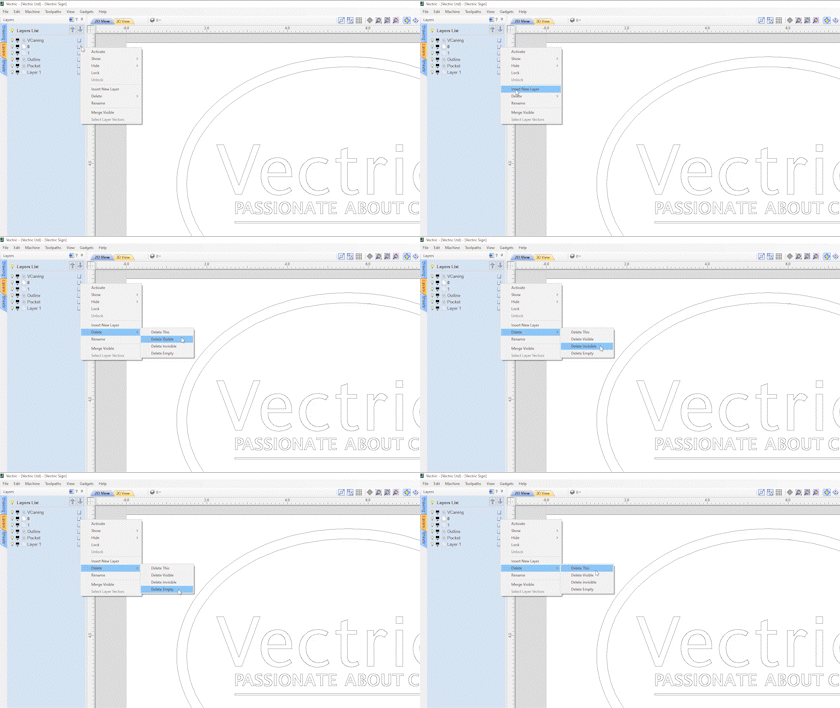
Delete Empty Layers
It is now possible to delete multiple layers from the right click menu within the layers menu. Where you have the option to delete this layer, visible layers, invisible layers and empty layers! Providing you with plenty of options to quickly erase unwanted data from your layers list, at the click of your mouse.
3D Rest Machining
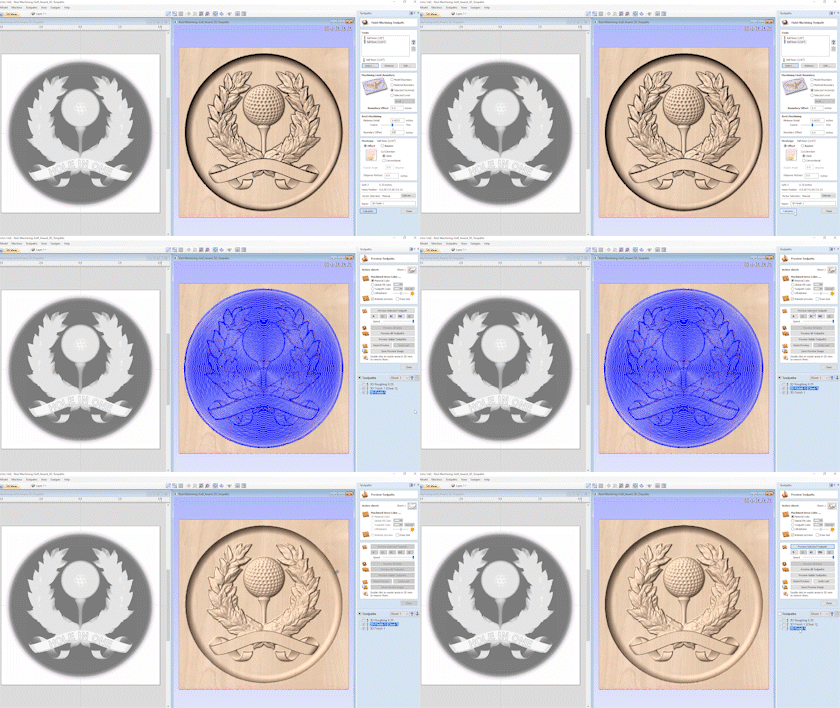
Rest machining is a technique which uses multiple tools to try and efficiently optimize machining time, material removal and tool lifespan. Within the 3D finish toolpath you now have the option to use more than one tool, with each tool removing any remaining material that the previous tool was unable to machine. The rest machining technique can be controlled by specifying parameters which determine what areas are worth machining with the smaller tool.
3D Roughing - Avoid Machined Areas
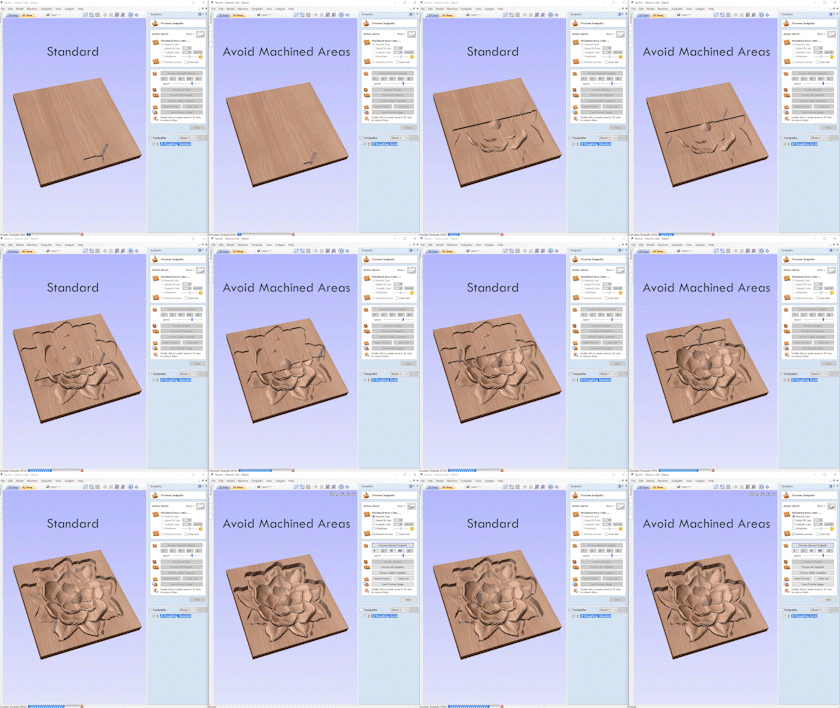
The 3D raster strategy in the 3D roughing toolpath now has the option to avoid machined areas. This will mean that if an area has already been machined by a previous pass, then the current pass will try not to re-machine this area. For some types of 3D models this will result in shorter machining times.
Variable Thickness Relief Slicing
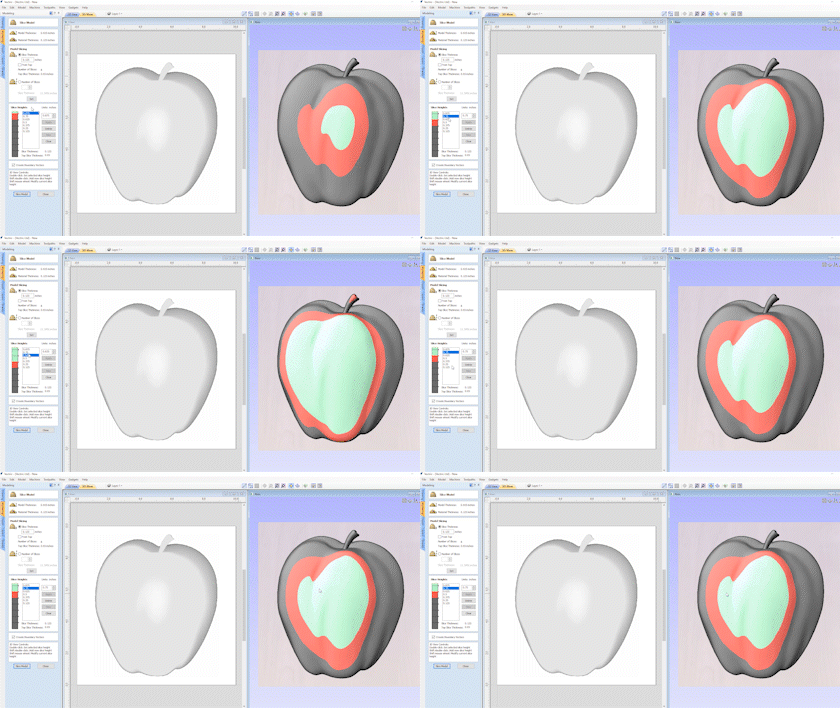
The relief slicing feature now gives you the option to choose the thickness of individual slices, where they can be tweaked and visualised in the 3D view to give you maximum control of how your model is sliced for machining. This helps to ensure that there are no thin slices that can be problematic from a machine and assembly point of view.
Re-Import 3D Models
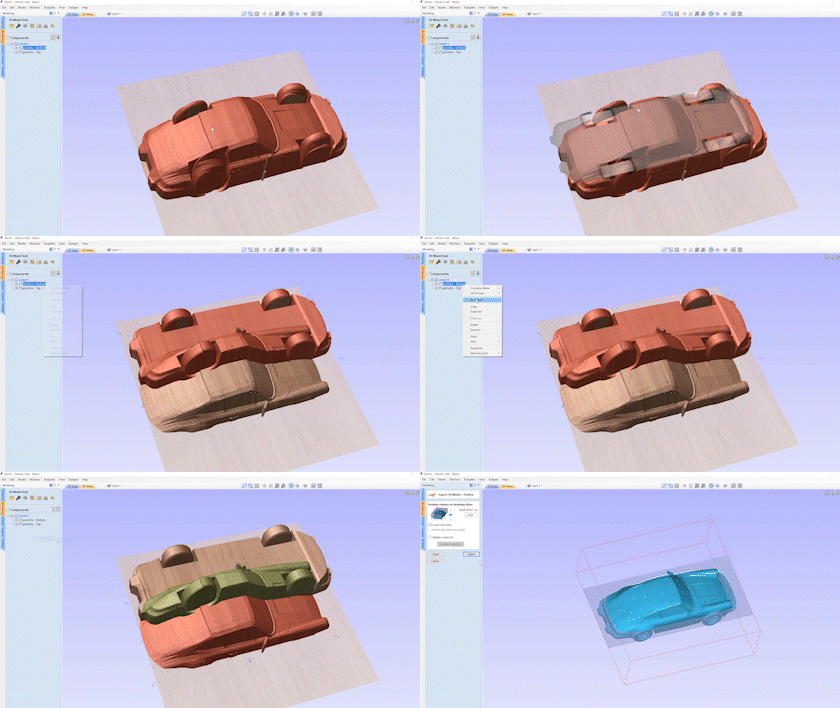
When you import 3rd party 3D models as standard components in the software you can right click on the component(s) to take you back to the model orientation form where the software will remember the last settings used making it easy for you to make those fine adjustments ready for import.
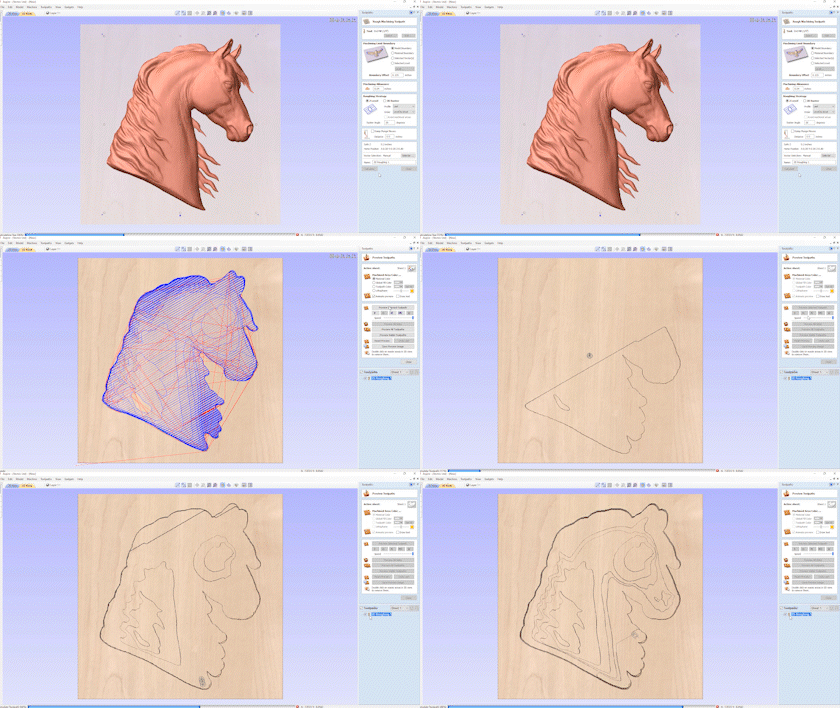
3D Roughing - Raster Angle
When using the 3D roughing toolpath there is now the option to specify a raster angle that no longer restricts you to the X or Y axis. Helping to avoid scenarios where there is excess material left for the finishing toolpath.
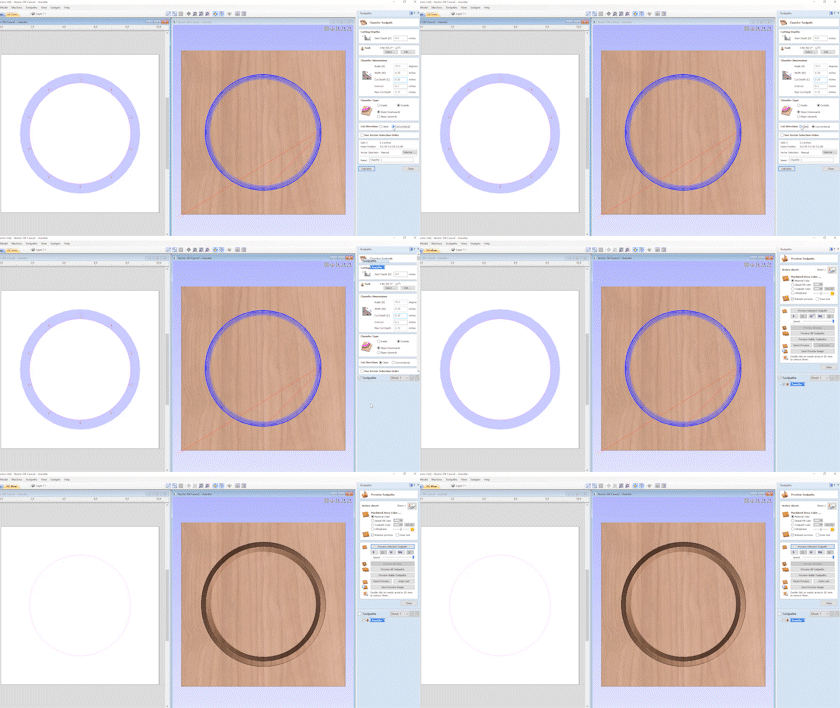
Chamfer Toolpath - Overcut and Cut Direction
In the chamfer toolpath we’ve introduced a new overcut option which enables you to use the side of the tool to make the final cut along the edge of the chamfer. This helps to ensure that the tip of the tool stays off the finished part. For example, if you were using a v-bit tool that doesn’t quite have a pointy tip then by over cutting we can help to eliminate the unsightly witness marks that would otherwise have occurred from the flat end of the tool. We’ve also added the ability to specify the cut direction for your chamfer where it can be set to either conventional or climb machining, helping you to achieve the best possible results with your chamfer projects.
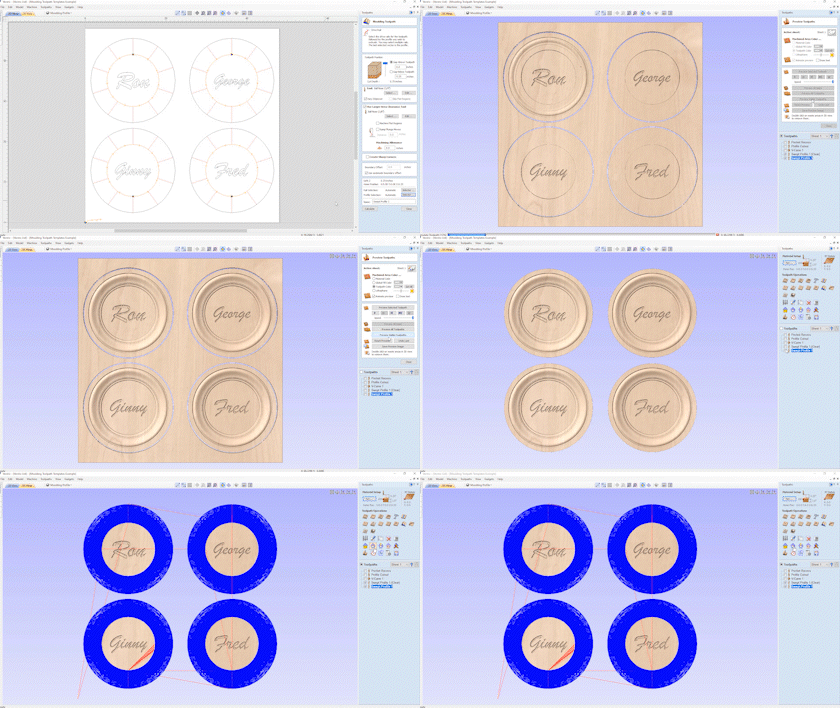
Moulding Toolpath Vector Selector
In the moulding toolpath form you can now make use of the automatic vector selector options allowing you to automatically select the rail and profile vectors for machining.
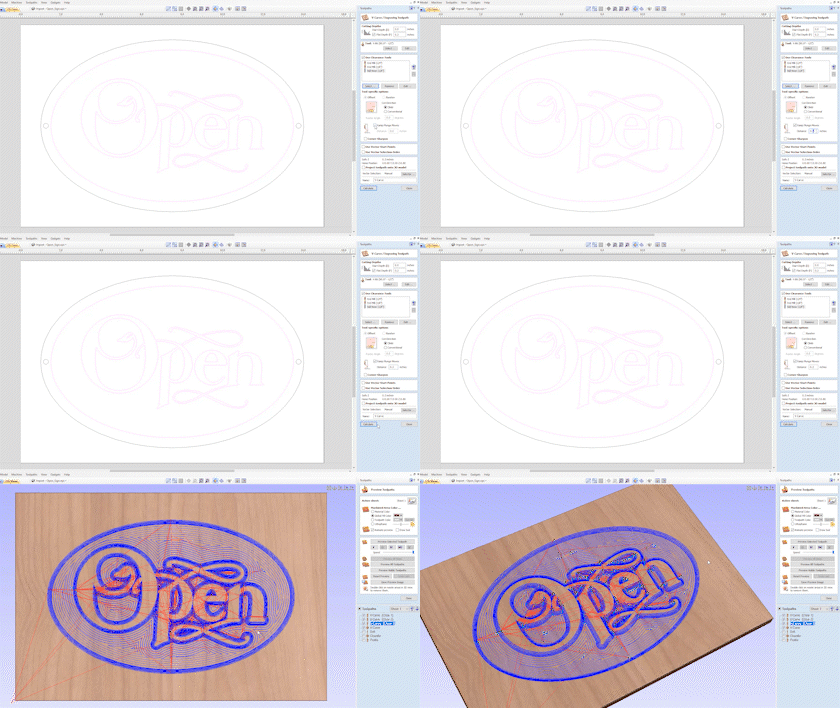
Ramping on all VCarve End Mills
The VCarve Toolpath allows you to use a series of area clearance tools to help remove excess material. It is now possible to ramp plunges moves for all end mills and other types of clearance tools for which the corner sharpening option is unchecked. Helping to reduce the chance of your tools breaking, and can reduce wear and tear on the tools.
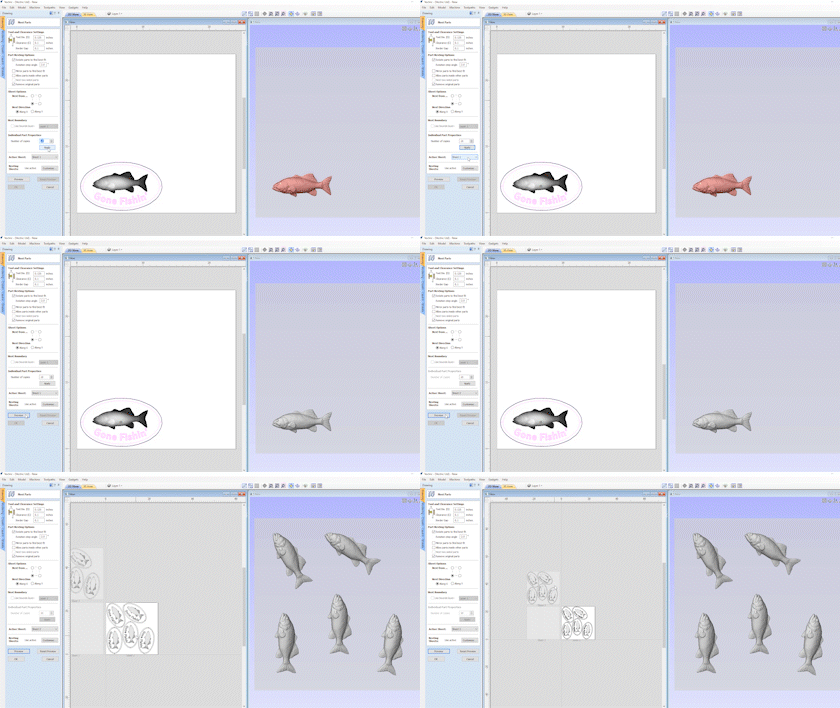
Nesting Components and Vectors Simultaneously
It is now possible to nest components and vectors simultaneously within your job using the nest tool.
Version 10.5
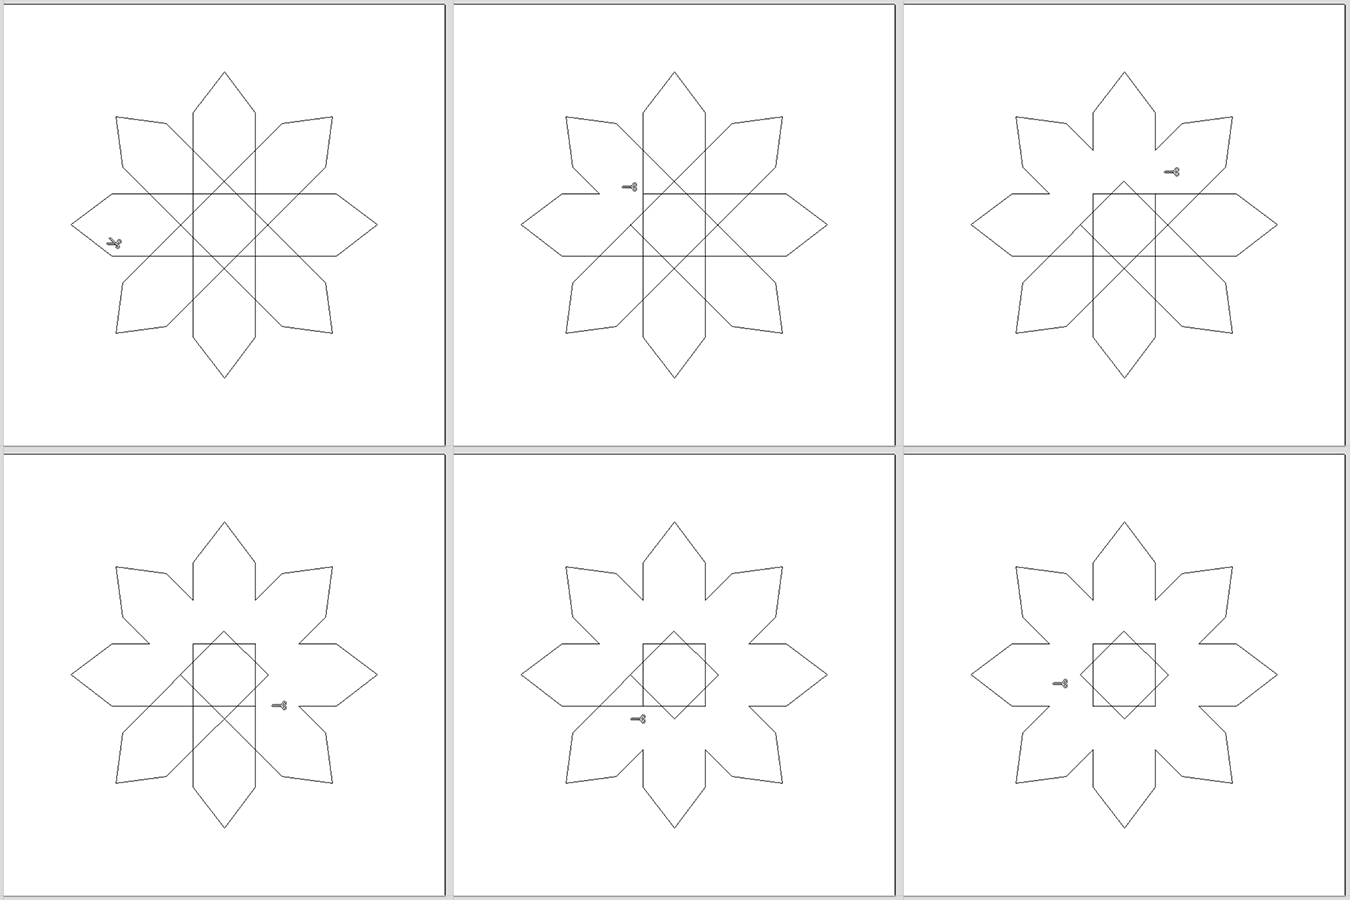
Drag Snipping
You can interactively snip overlapping vectors by simply dragging your mouse along the intersections you want to remove! This means you no longer have to click on each individual span, making the process much smoother where you will be done trimming in no time!
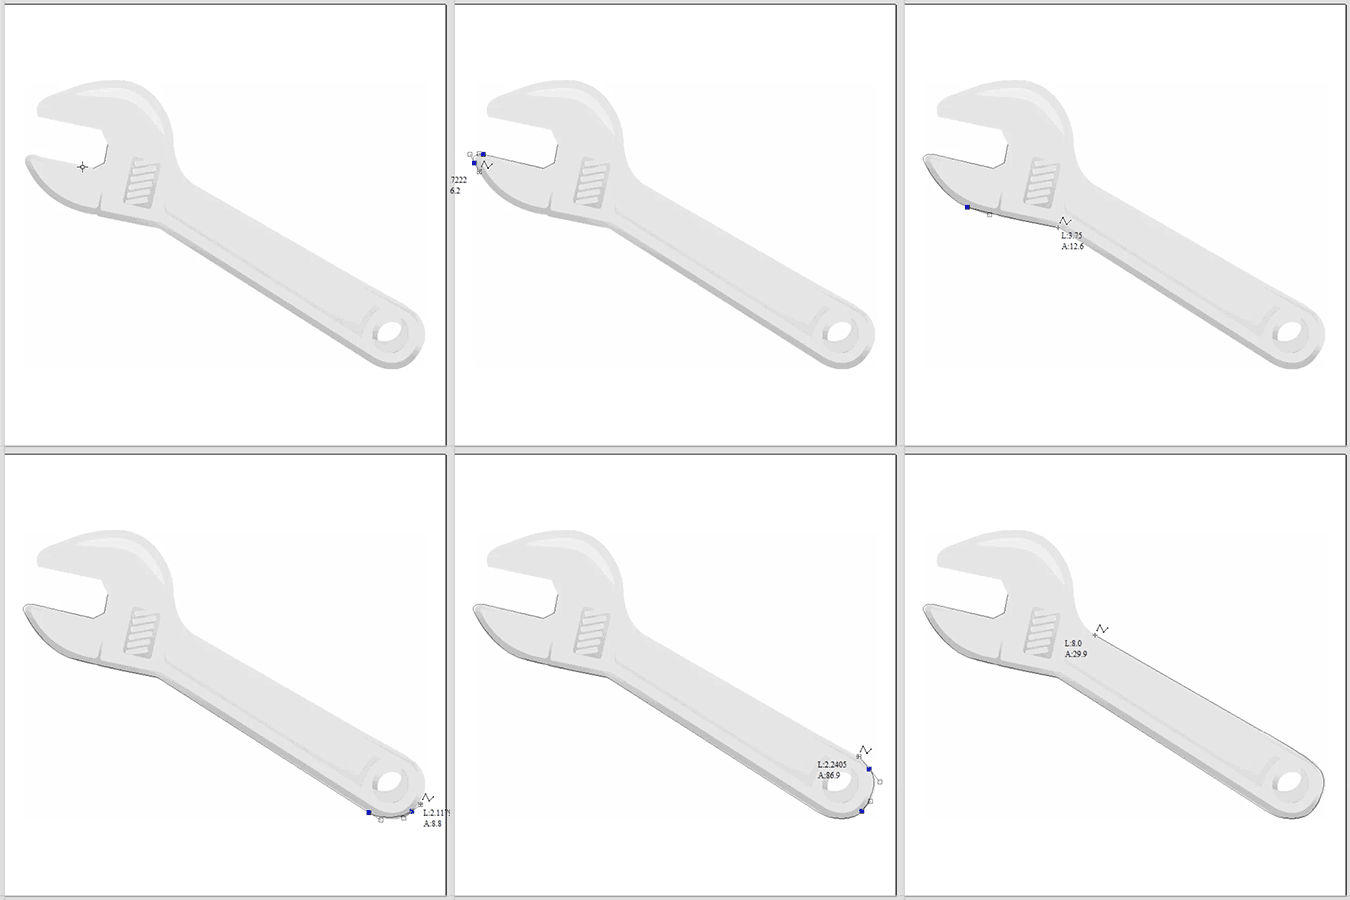
Improved Polyline Tool
We have improved the way in which the 'draw polyline' tool works, where you now have the added option to draw in bezier spans interactively, allowing the overall drawing process to be done much more efficiently.
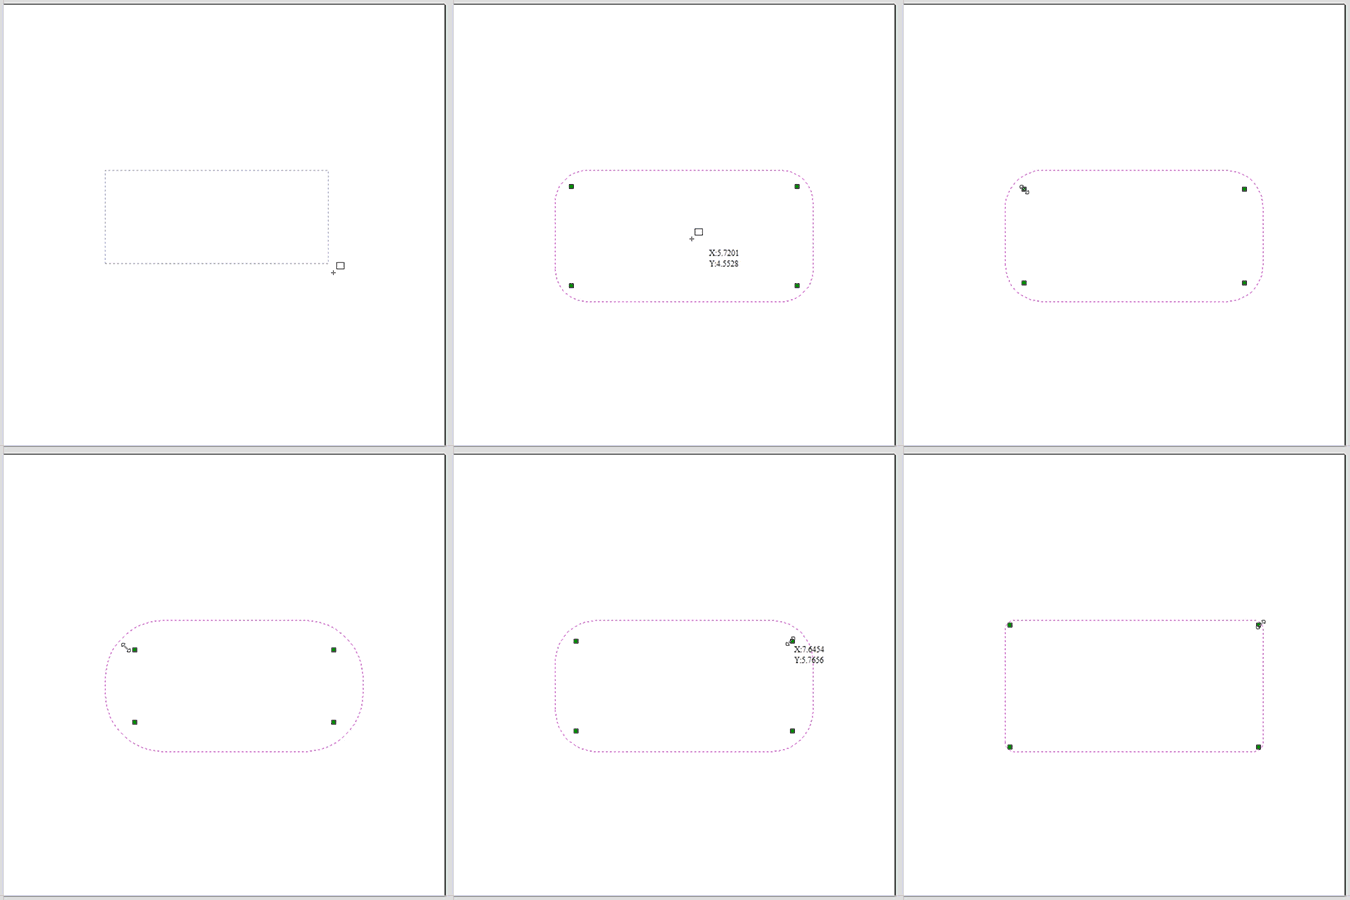
Dynamic setting of Rectangle Corner Radii in the 2D View
The way we create radiused internal and external corners has been vastly improved to allow you to dynamically set the radii of the corners in the 2D view, allowing you to visually set the radius of the external or internal corners.
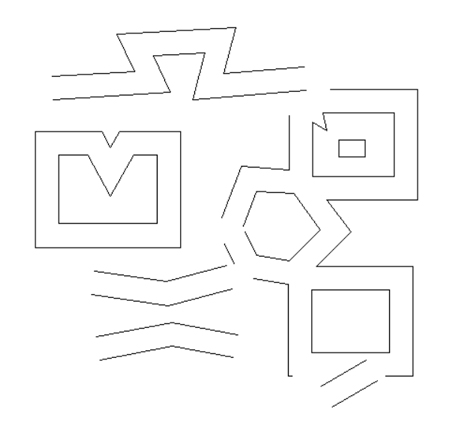
Improvements to Sharp Corner Offsetting
We've made improvements to the way that we handle sharp corners when we offset vectors to give results which are more correct and visually pleasing.
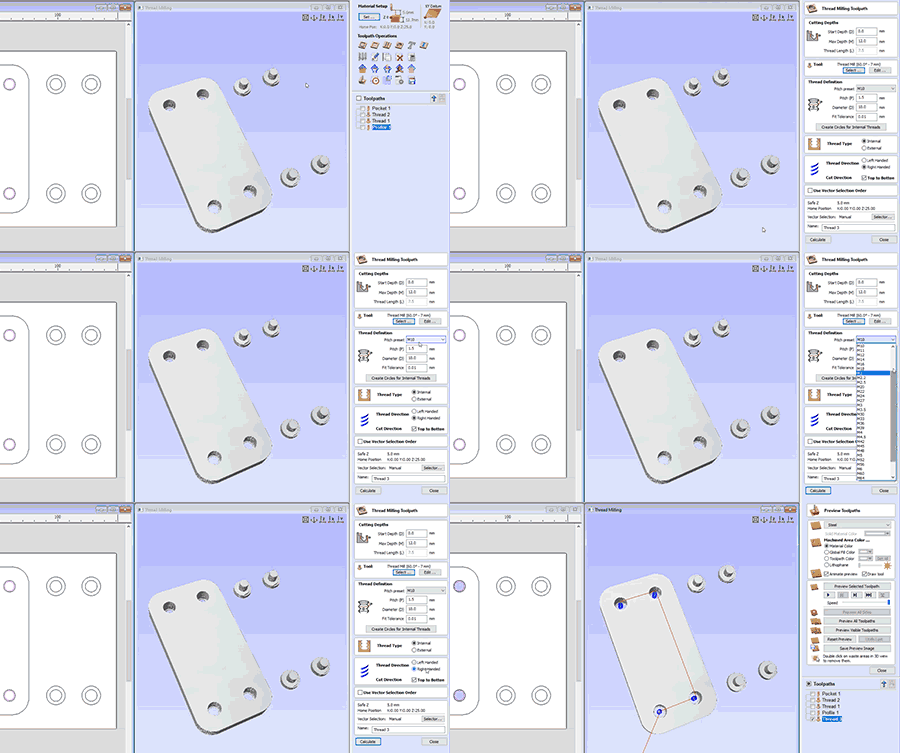
Thread Milling Toolpath
We’ve introduced a brand new toolpath to our selection, this is the thread milling toolpath. This toolpath enables you to machine holes for standard size screws in metals and acrylics, and is also useful for the creation of decorative wood fasteners. The thread milling toolpath has the option to create both internal and external threads, for example if you wanted to create a cavity to screw something into or if you wanted to create an exterior thread on something like a bolt!
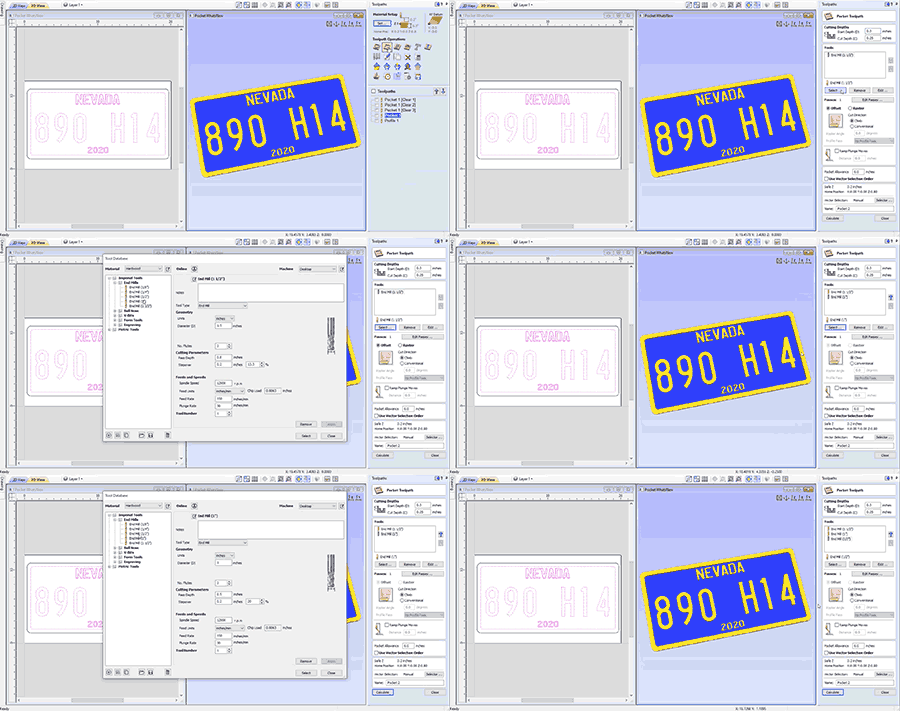
Multi-Tool Pocketing
The pocket toolpath and the female Inlay pocket toolpath now support multiple clearance tools for more efficient area clearance. Using multiple tools means that you can use a much larger clearance tool for clearing moderately large areas as well as progressively smaller tools to remove smaller areas making this process as efficient as possible. The largest tool in the list will always display first and will remove as much material as it can and any subsequent tools that follow will only machine areas where the previous tools could not fit. Using multiple tools with this strategy can help shorten machining times and improve the life of your tools.
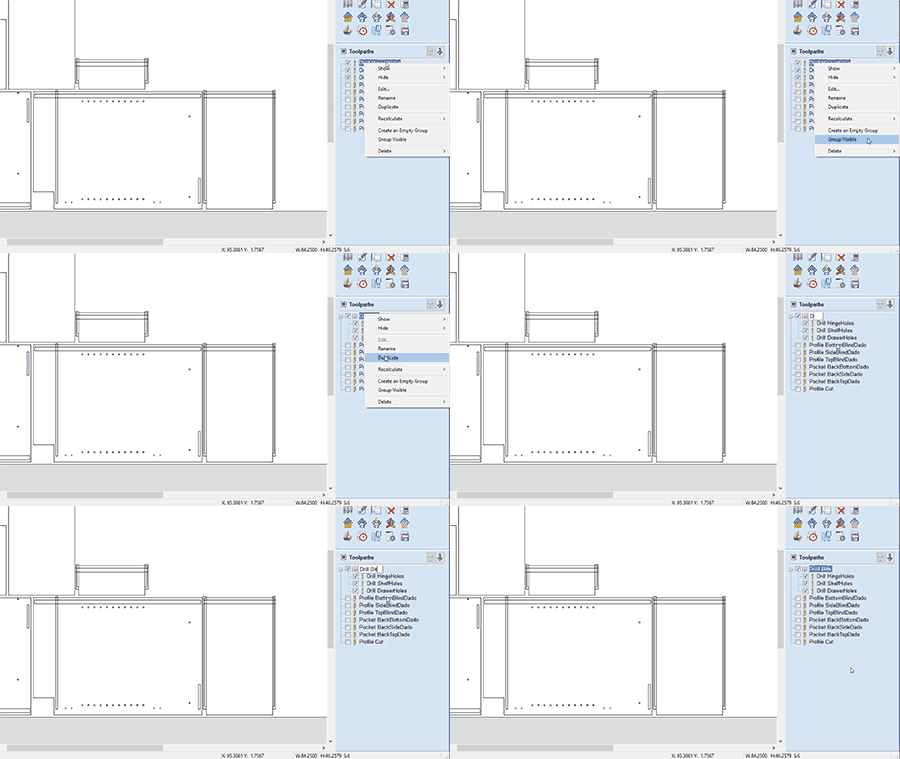
Toolpath Group Improvements
We’ve made improvements to the functionality of Toolpath Groups making them much more useful! We’ve made it more convenient to create toolpath groups where you can create them from an empty list to help start the organisation of your toolpaths right from the get go! We’ve also added the ability to create groups from visible toolpaths in the list, which is useful when you want to organise your toolpaths by different materials used, tool types or grouping the toolpaths by part, however you like to organise your toolpaths we’ve made it very easy to do!
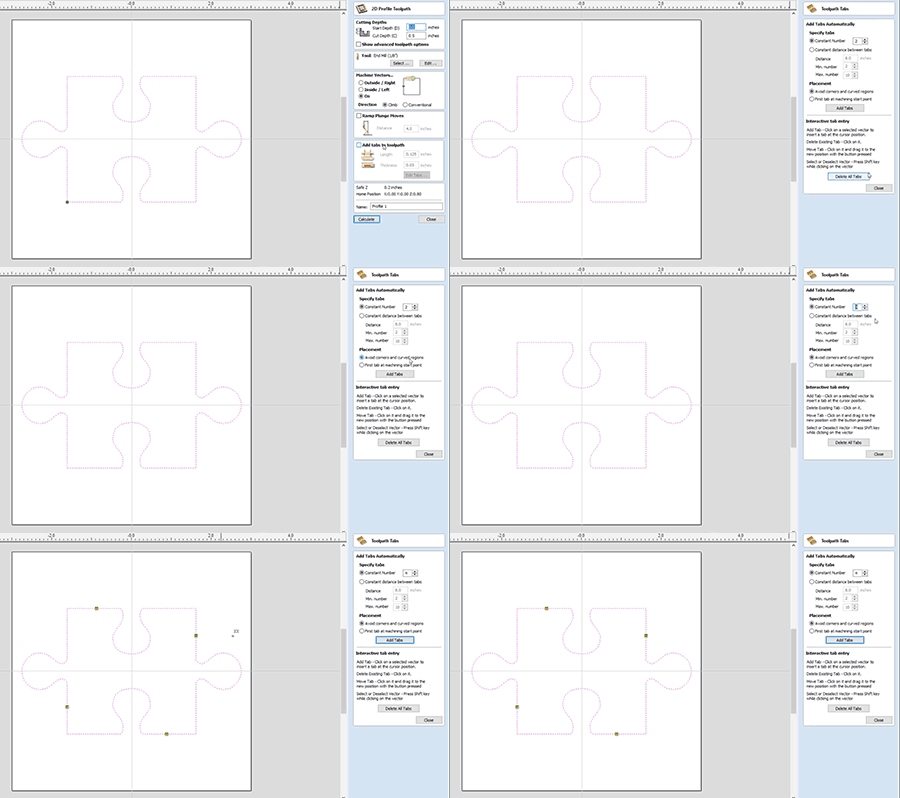
Toolpath Tab Auto Placement
10.5 sees some nice enhancements made to automatic tab placement in the profile toolpath. By default tabs will be positioned to avoid corners and curved regions, minimizing the need for manual adjustment.
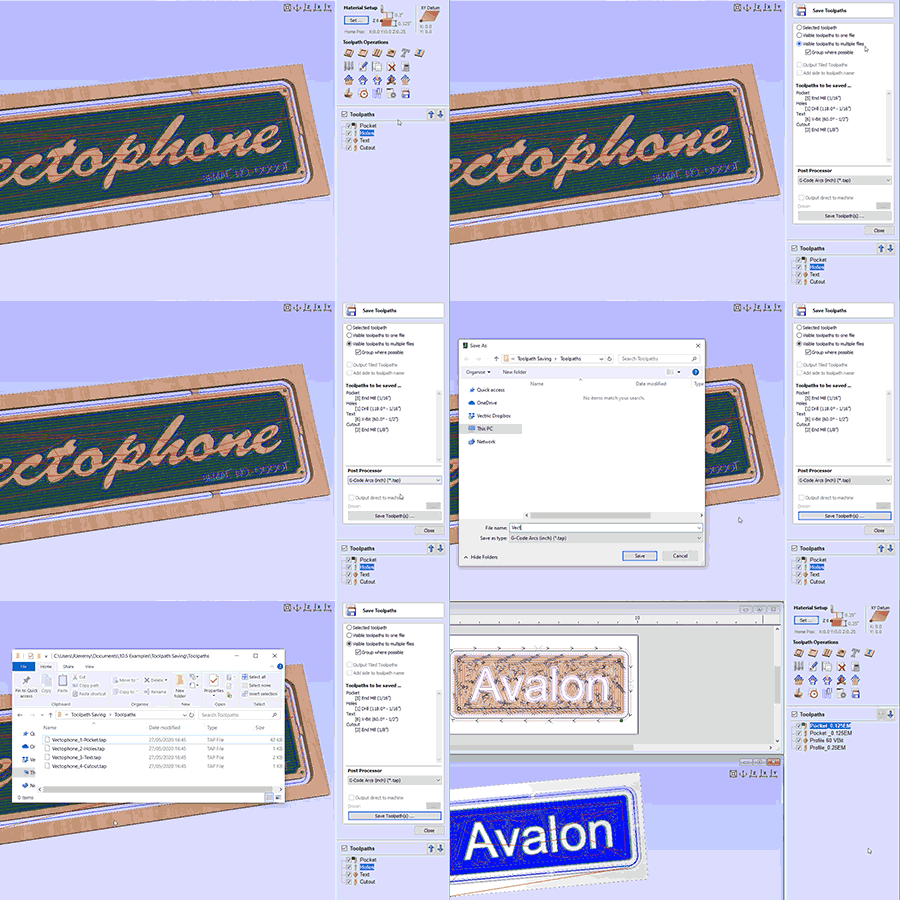
Toolpath Batch Saving
We’ve made it easier than ever to save out your toolpaths! Now you have the ability to output multiple visible toolpaths to separate files in just one click! Along with the ability to output toolpaths together so that you can save your toolpaths in as few files as possible!
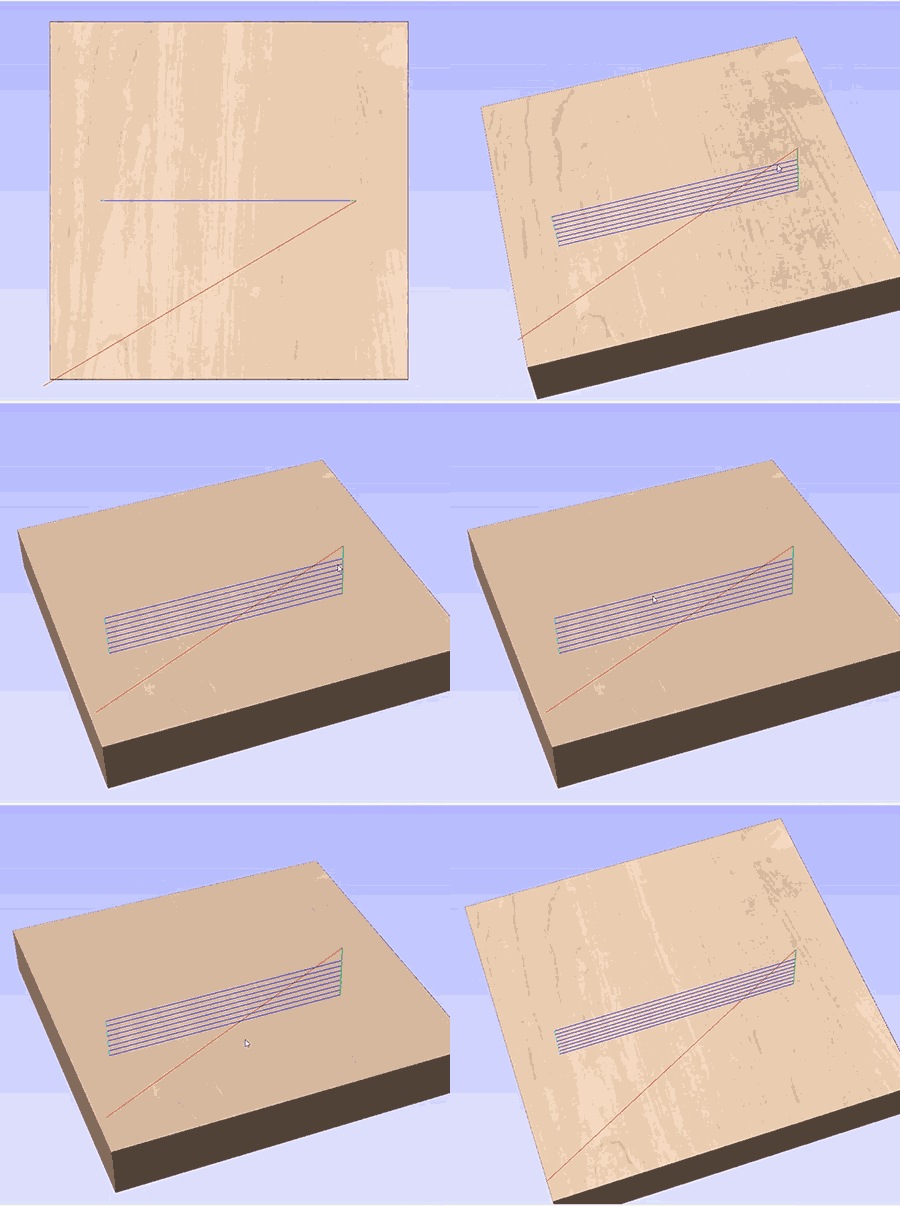
Stopped Repeated Retracts and Plunges in Profile Toolpaths
In the profile toolpath we stopped repeated retracts and plunges when cutting on open vectors to reduce machining times and make the whole process more efficient.
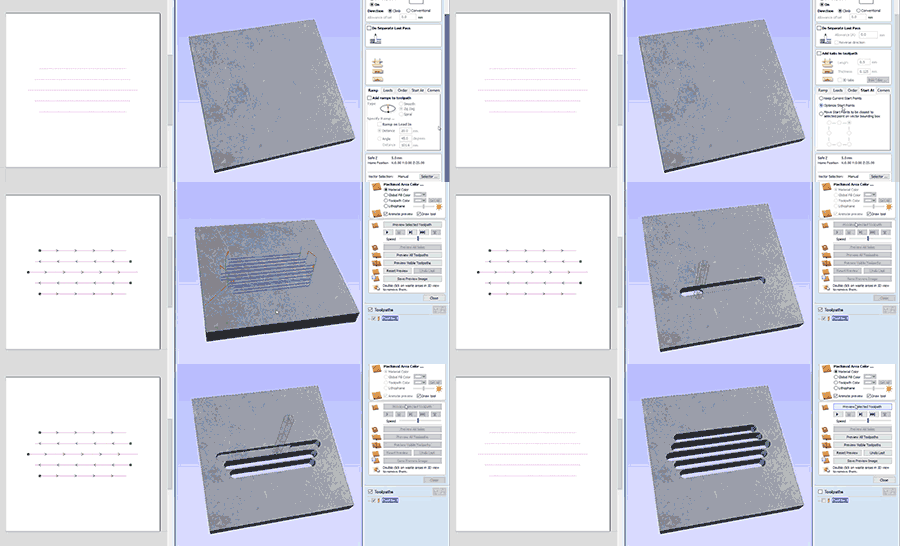
Optimise Link-up Moves Between Open Contours When Cutting Direction Doesn’t Matter
We have optimized the link up moves between open contours when the cutting direction doesn't matter allowing for more efficient machining with reduced machining times.
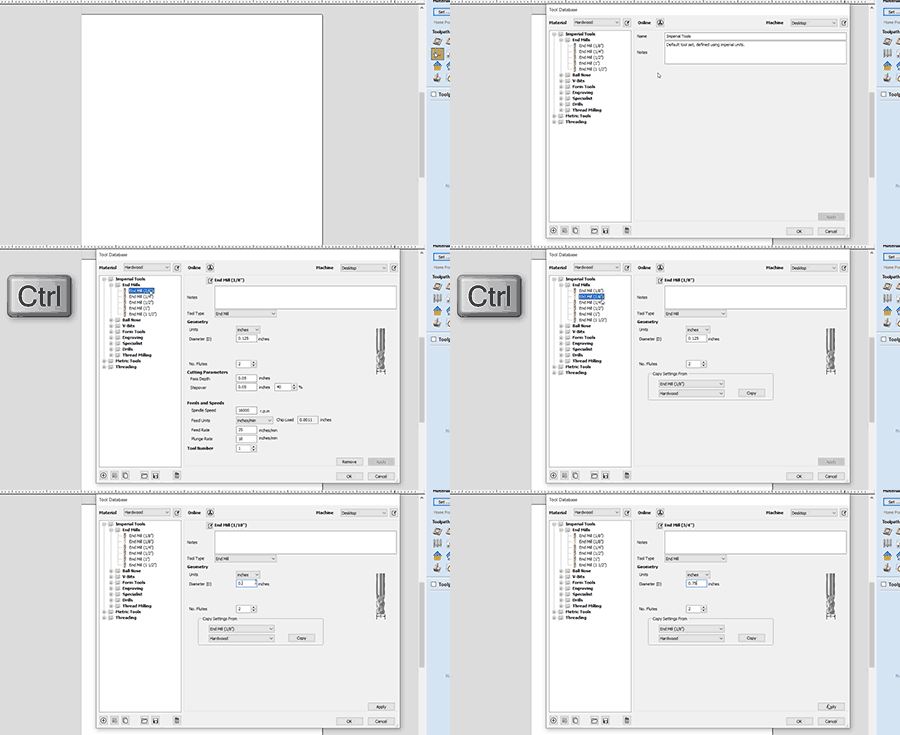
Ctrl + Drag in Tool Database
For ease of use we have added the ability to copy tools in the tool database by simply selecting to the tool along with the CTRL key and dragging your new tool into position ready for editing.
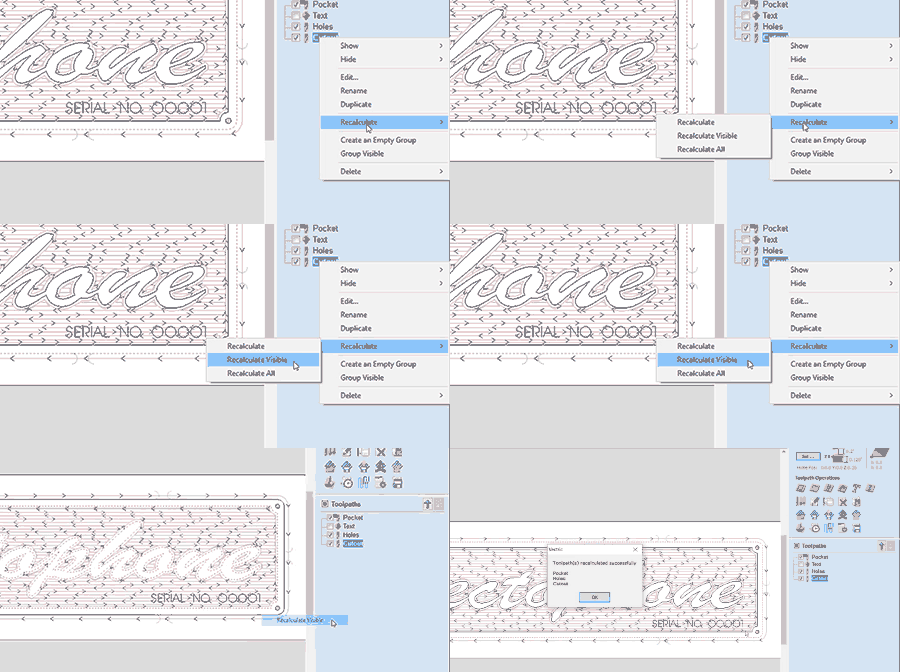
Calculate All Visible
We have now added in a further right click option to calculate all visible toolpaths allowing you to update only the required toolpaths.
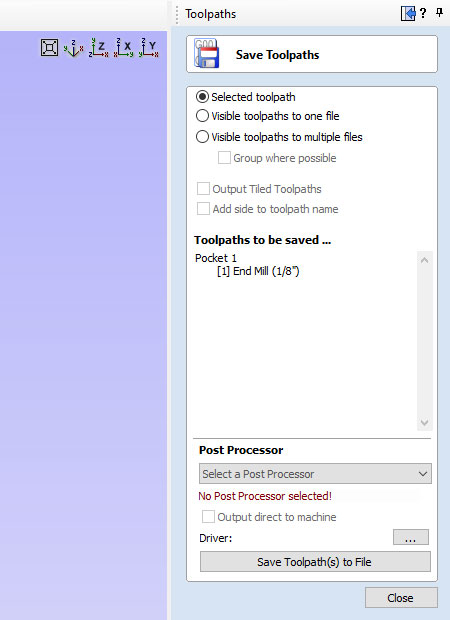
On First Toolpath Save, no post-processor is selected
On first toolpath save, no post-processor is selected, allowing you to select a post processor from the post processor menu.
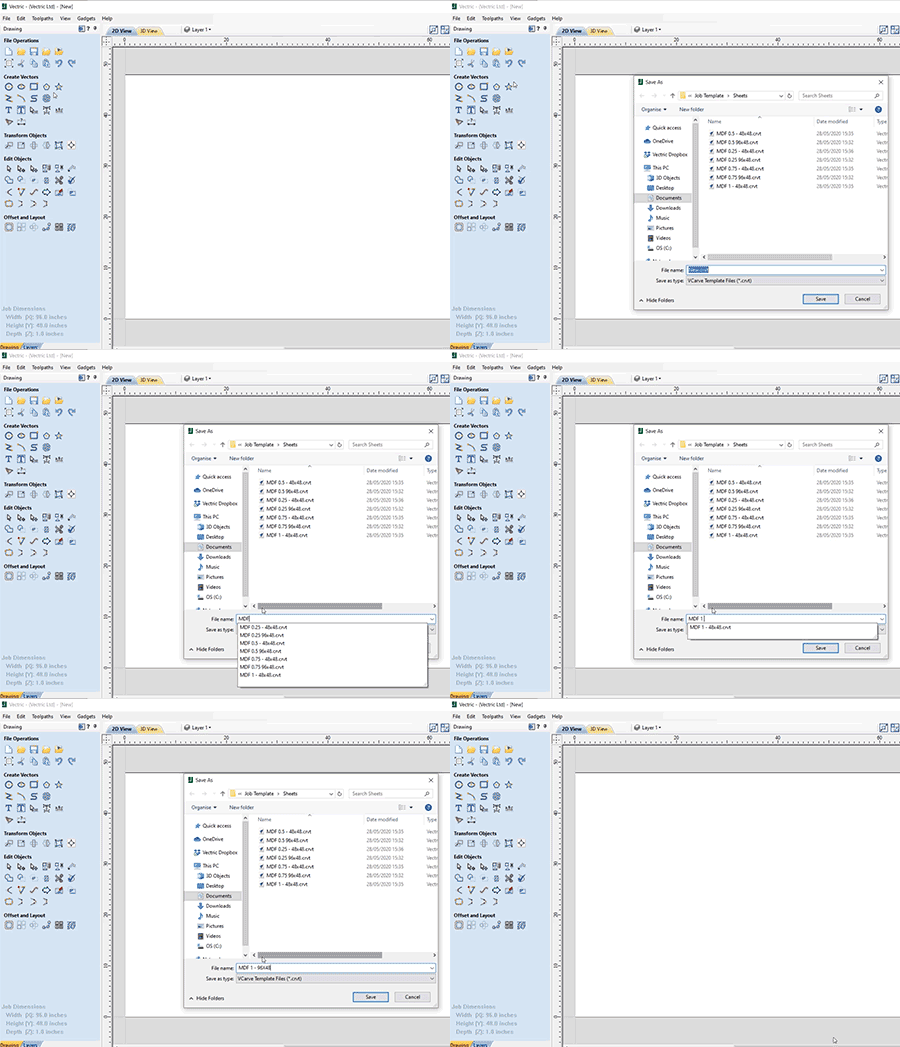
Job Templates
We have introduced the "job template file" concept allowing you to set-up template files that use common settings you may want to reuse for similar jobs in the future.
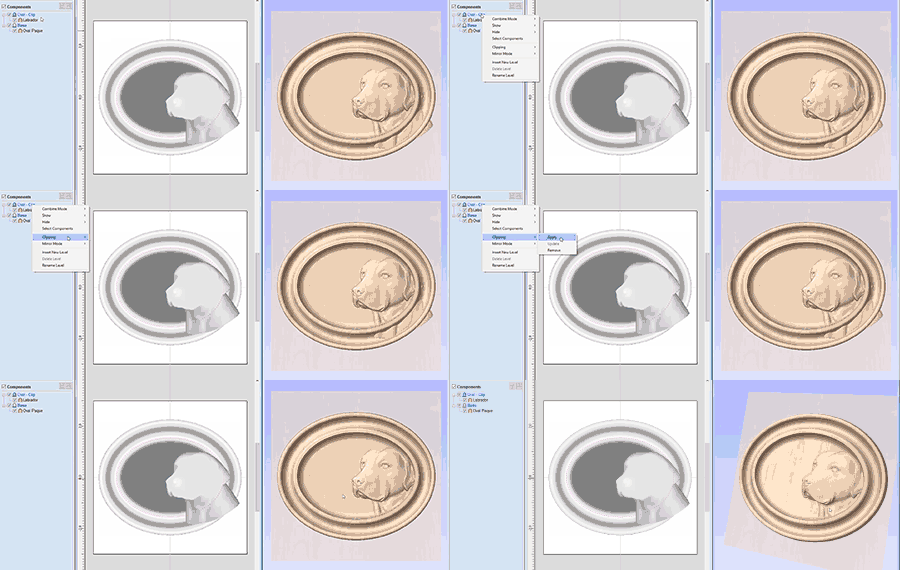
Improved Level Clipping Workflow
Where level clipping is concerned we have made some improvements to the overall workflow. It is now much easier to adjust your clipping boundary and change how your model is clipped. We have added three options allowing you to "apply", "update" and "remove" a clipping effect making it more intuitive and much easier to update changes to your clipped vector boundary.
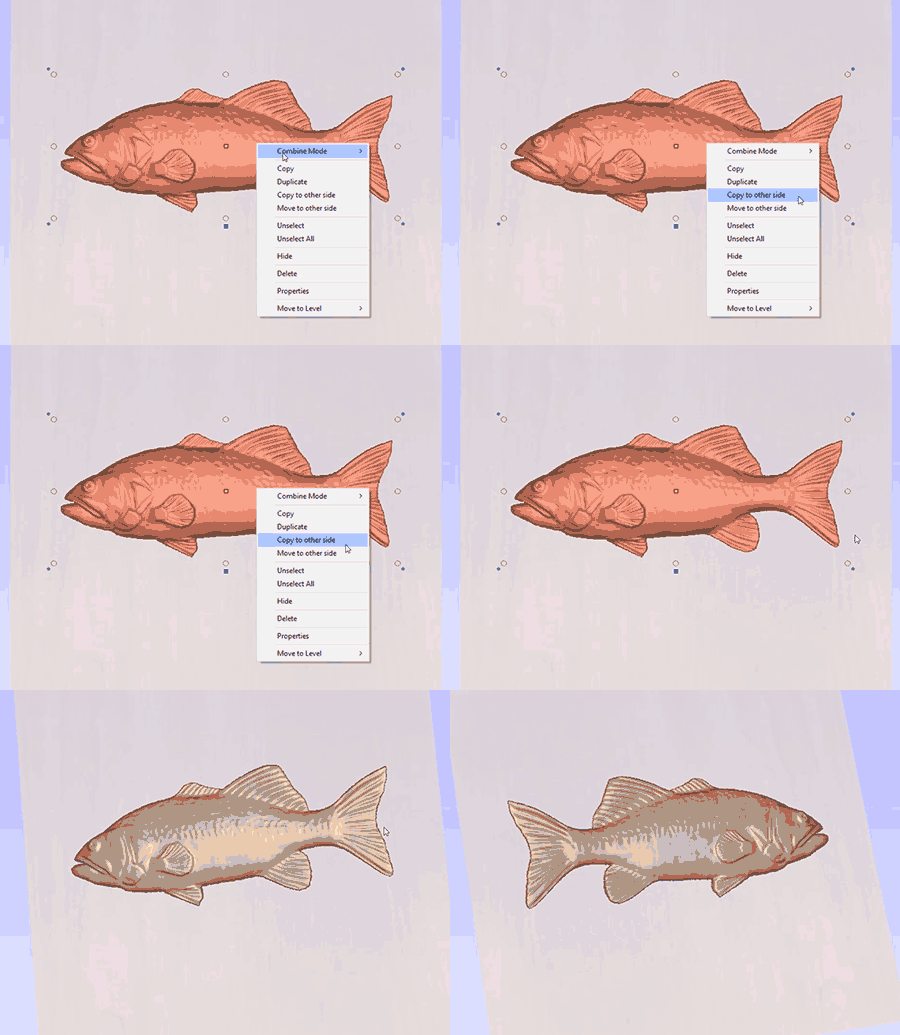
Two Sided Machining: Copy to the other side in 3D View
When working with 3D items in a double sided job, you can now copy and move components to the other side directly from within the 3D view, ensuring a much quicker workflow.
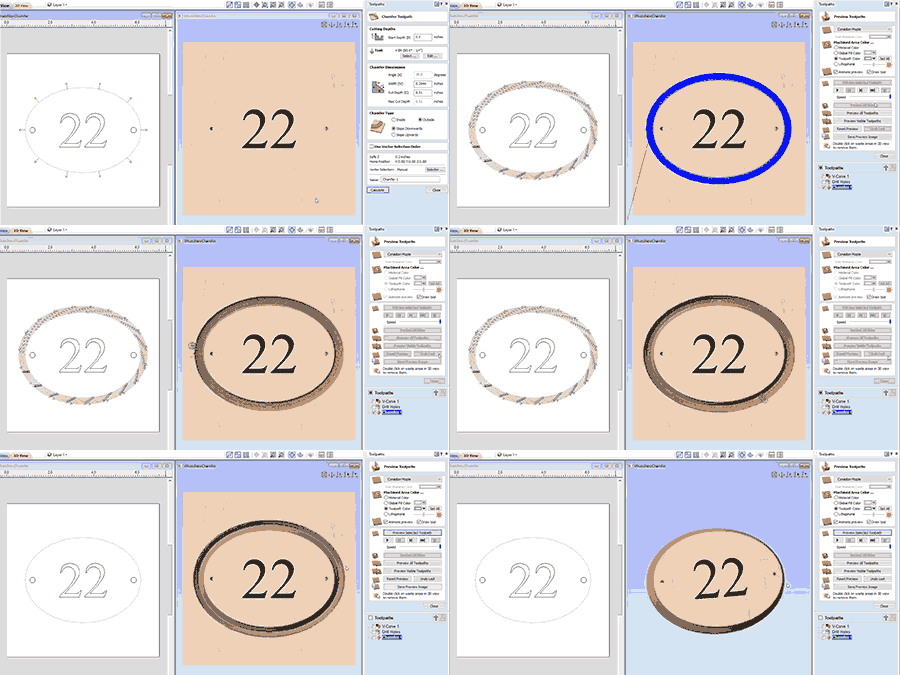
Chamfering/Counter-Sinking Toolpath
We have introduced a brand new toolpath: The chamfer toolpath. This toolpath allows you to easily create chamfers using v-bits or ball nose tools to create decorative edges and is also a great way to create counter-sunk holes.
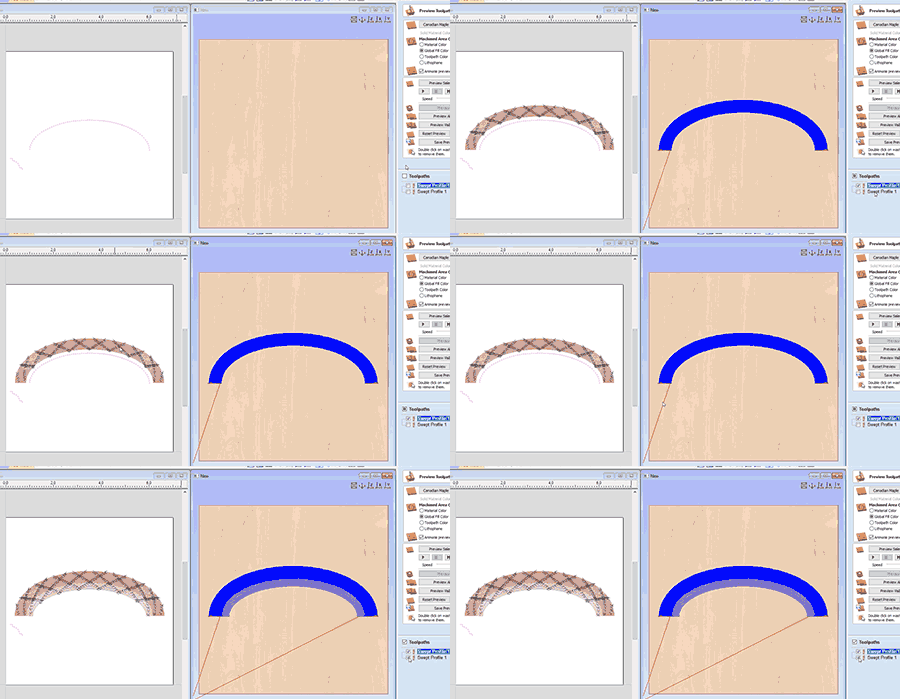
2D Preview for Moulding Toolpath Roughing
We’ve made a minor enhancement to the way we preview the moulding toolpath in the 2D view, where we are now able to visualise the clearance toolpath as well as the finish.
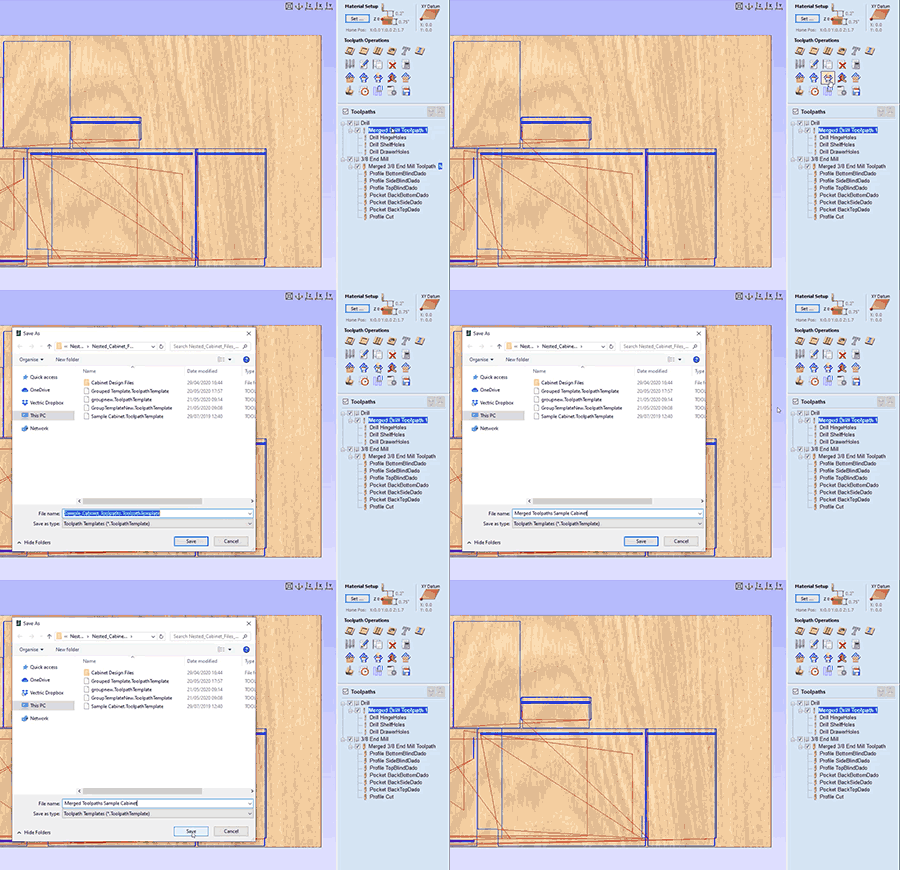
Saving Merged Toolpaths in a Toolpath Template
We now have the ability to save a merged toolpath within a toolpath template ensuring that all template jobs that you create retain the parameters originally set out, enabling you to get the next job done efficiently.
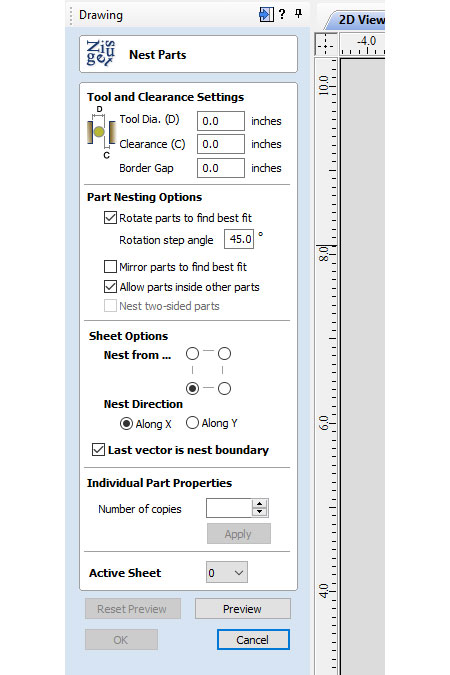
Save and Restore Last Vector is Nest Boundary Option on Nesting Form
The software will now save and restore the check box "last vector is nest boundary" option within the nesting form.
Version 10
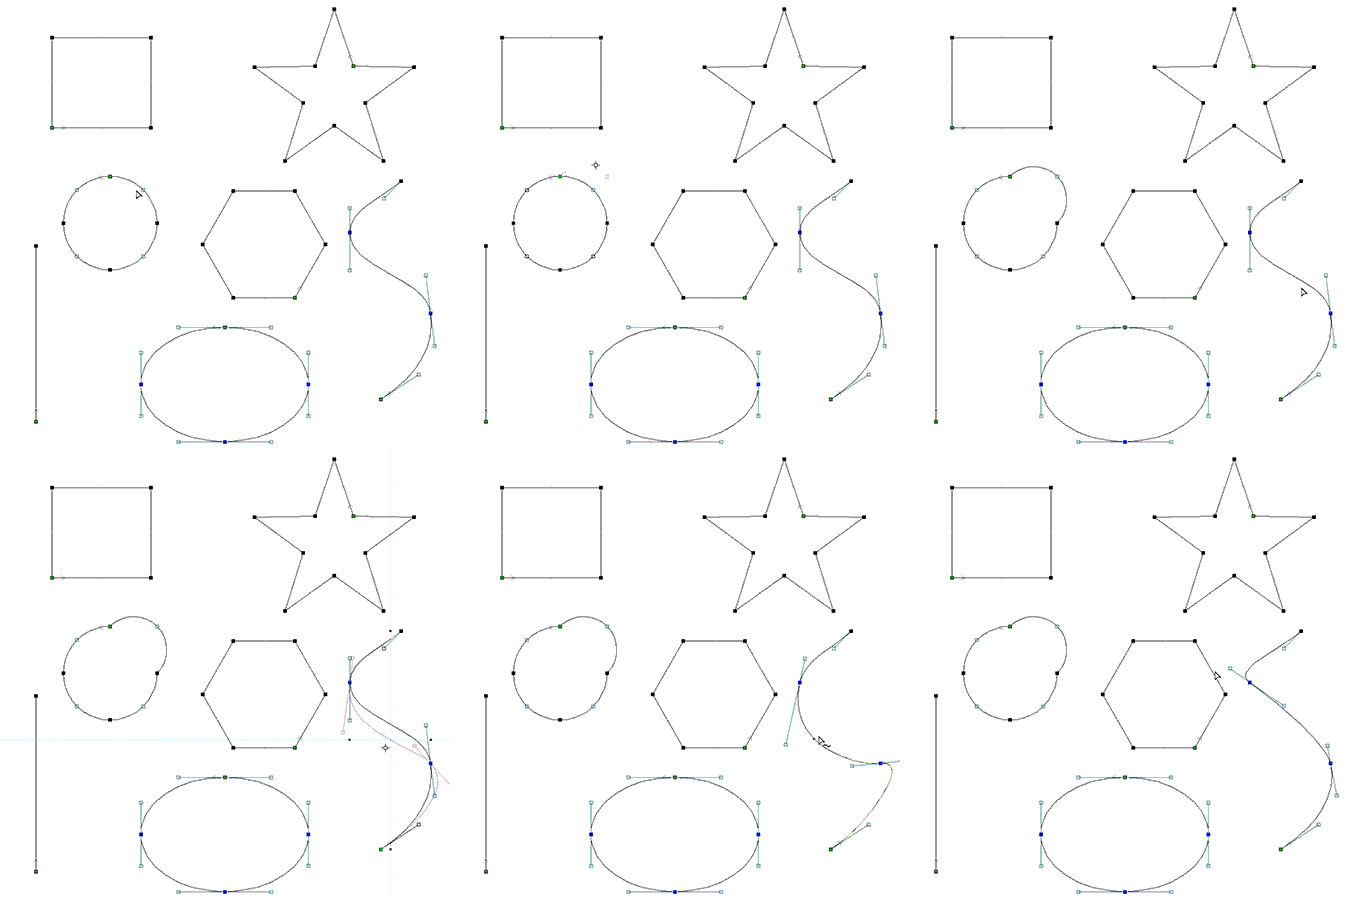
Node Editing
Node editing can now be performed on multiple vectors selected at the same time. Making it easier to access all the nodes and spans in your job for multiple editing, without having to access each vector individually. We have also added the ability to transform your vectors directly from the span itself allowing you to drag individual spans and change their shape in the case of arcs and Beziers, or moving the whole span in the case of lines for a much easier, intuitive workflow to get you to the shape you want. In cases where you have two open vectors, you can select the end points of each vector and join them together whilst remaining in node edit mode using the right click menu, you can then join them with a straight line, a curve or the mid point between the two.
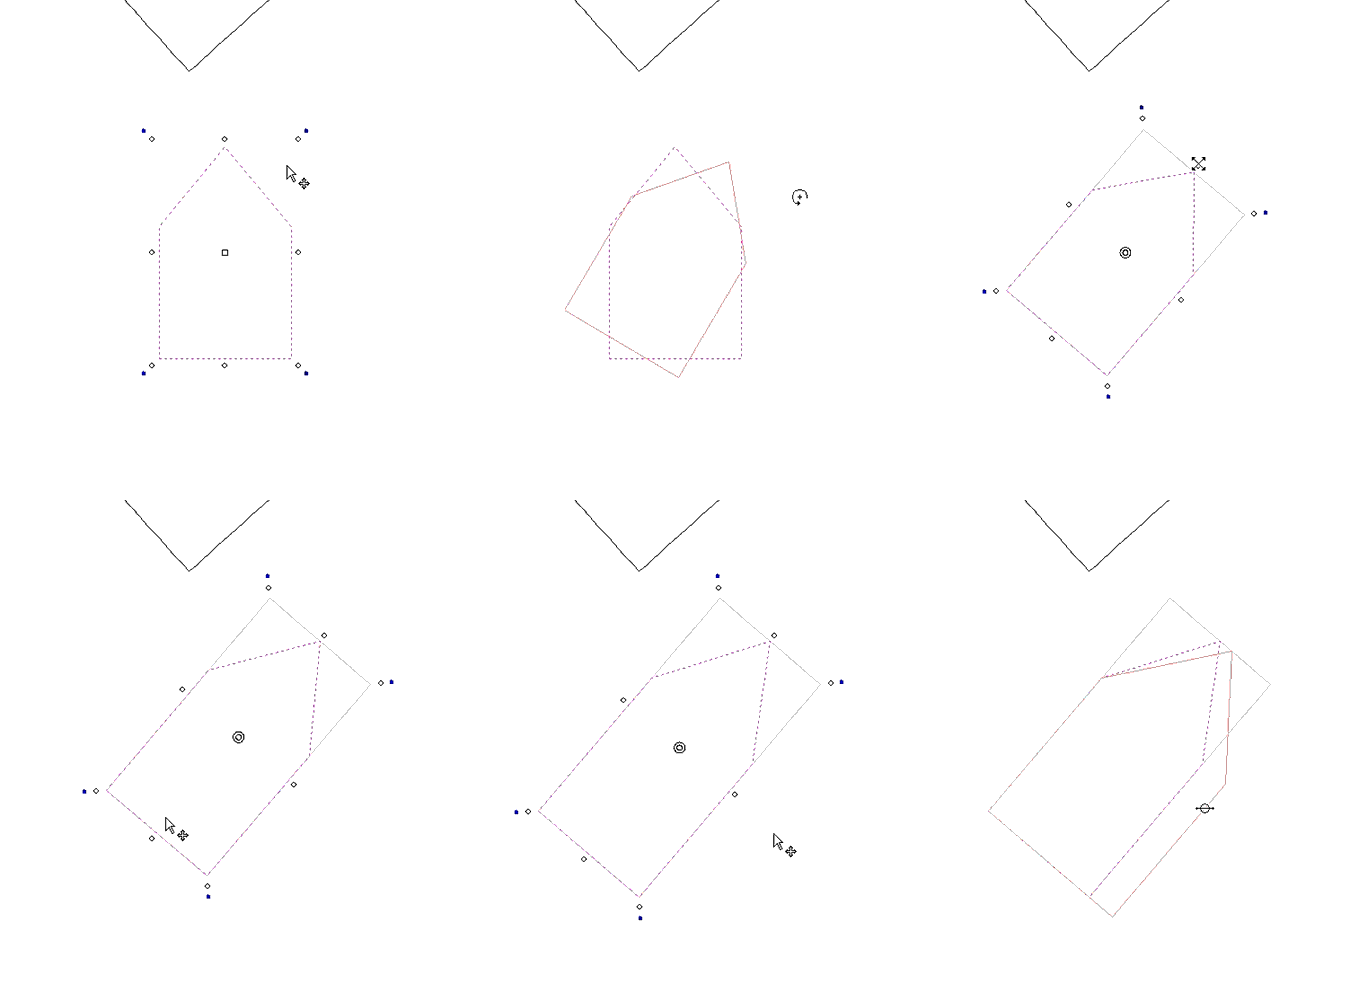
Maintain Object Rotation
When rotating and scaling objects, the original bounds are now maintained. Allowing you to scale rotated objects along their axes more easily and intuitively. When we scale the size of a rotated object we can now scale the part in line with the rotated bounds of a selected object. To accommodate this enhancement, we’ve also updated various transformation tools to include the rotated bounds when making transformations to a rotated vector, For example; In the move tool we can now move objects relative to their rotated bounds. In terms of rotation you can now rotate objects to an absolute value as well as a relative value to the current bounds. When working with rotated objects in the mirror tool we can check the option to use rotated bounds and all mirroring applications will be relative to the bounds of the rotated object. When working with the distort tool on a rotated object we can now edit the envelope within the rotated bounds making it much easier to control the shape of the distortion.
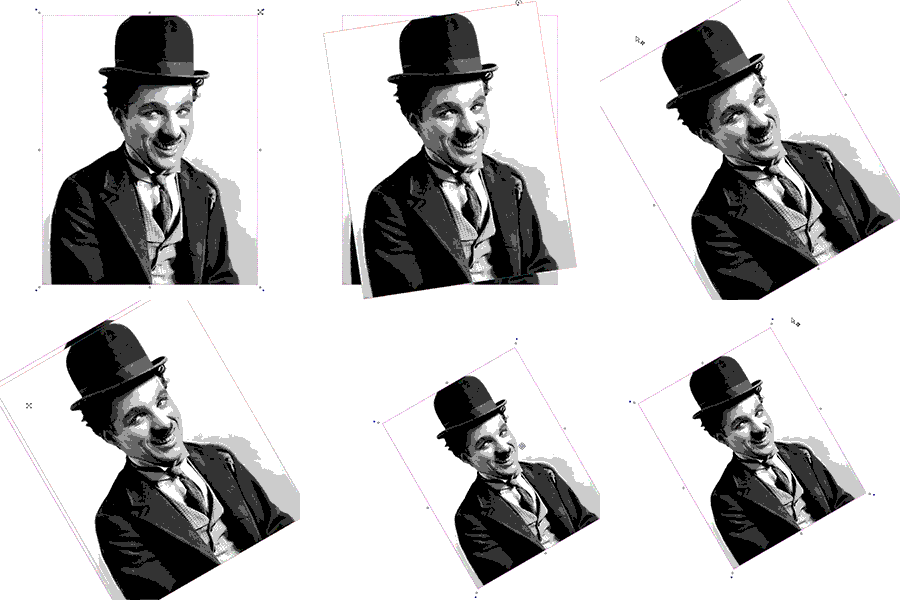
Bitmap Improvements
When importing bitmaps you now have the ability to rotate it directly in the software using the rotation handles on the corners of the image.
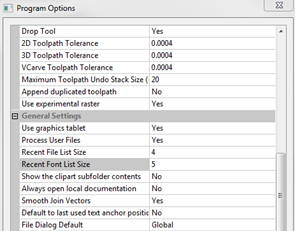
Font List Favourites
The font list in both the ‘create text’ and ‘create text within a vector box’ form will now save the 5 most recently used fonts at the top of the list to allow quicker selection of frequently used fonts, that way you save time searching for your favourite fonts. The number of recently used fonts displayed can easily be edited in the program options form to a number you are happy with.

Welding Text
The welding tool includes the welding of text objects all at the click of a button! Which is perfect for overlapping style fonts. Simply select your text, use the weld option where it will keep all of the internal regions of the text characters. You also have the option to keep or replace the original text object.
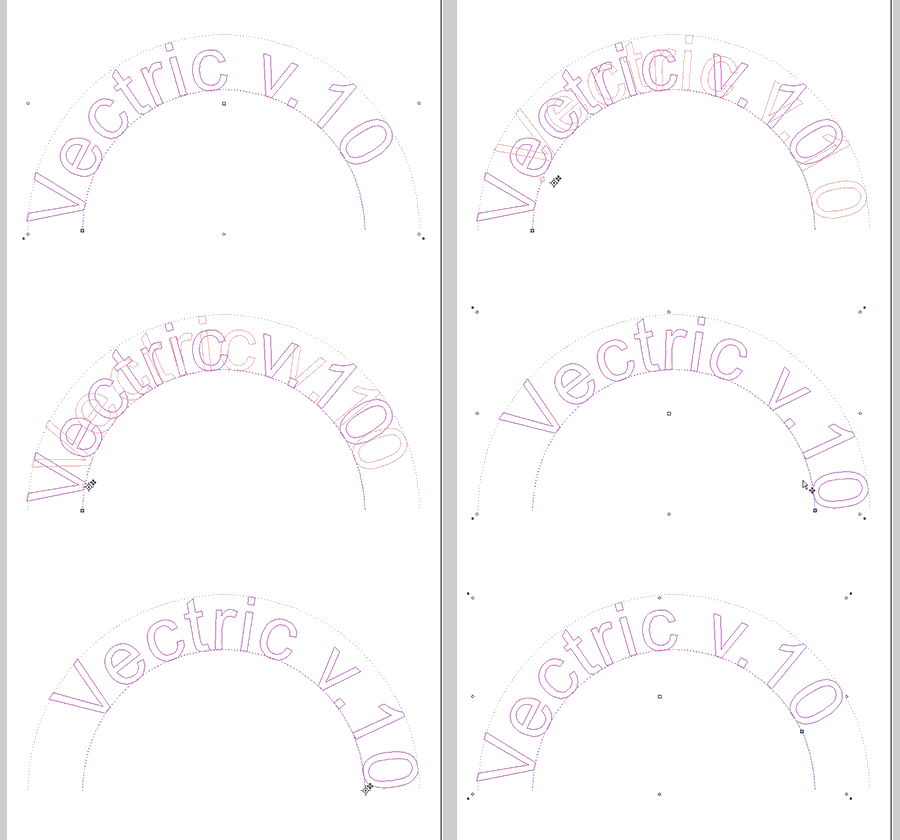
Dynamic Text on a Curve
When text is placed on a curve, its anchor can now be freely moved, rather than being limited to the standard three predefined locations of left right and centre, we can now move the anchor to give us much greater control of the position of the wrapped text. Another enhancement we have made is that the wrapped text can be detached from the original curve and still be re-worked in the wrap text form, where it remembers the original settings of the wrap if you wanted to make further changes.
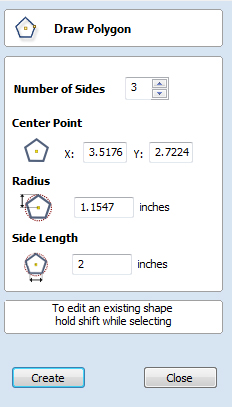
Add Side Length to Polygon Tool
We have added an extra option in the draw polygon form where you are now able to create a polygon by specifying the length of a side. For example if you want to create an equilateral triangle where all the sides are 2 inches long you can simply specify this in the form and the software will create it.
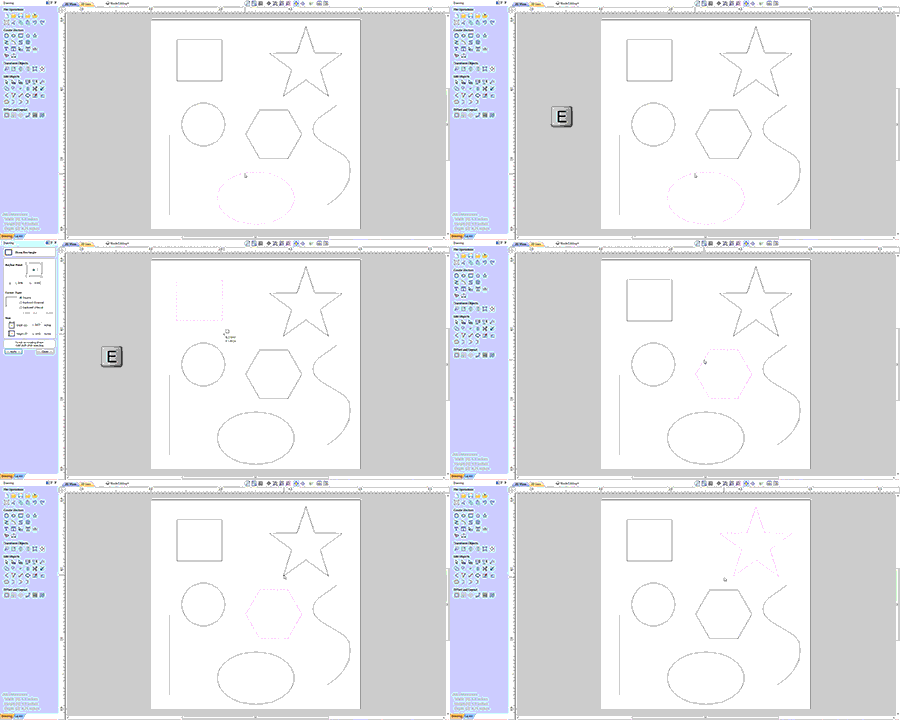
Shape Editing Shortcut
We have added a shortcut to quickly get you into a shape form for further editing. If a vector is selected which is able to be modified using one of the shape drawing tools, (circle, ellipse, rectangle, polygon or star) then by simply pressing 'E' on the keyboard the software will now automatically open the correct shape creation tool for the selected shape.

Space Selection Behaviour
The space selection controls in the alignment tools form will now maintain the X or Y ordering of any selected vectors and space them between the top and bottom or left and right items in the selection, regardless of what order we selected the vectors in.
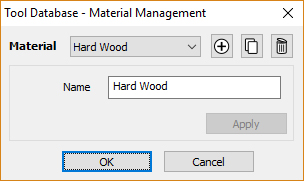
Tool Database
The tool database has been given a significant overhaul. You can now add parameters relevant to different machines or materials. For example if you use the same tool, but want different speeds and feeds for different materials, you can now adjust the parameters based on the material you're using. Once your materials are set up and you are ready to machine, you can filter the tools so that you only see the ones that are compatible with the material you're using. Use the new tool naming mechanism to consistently name your tools. Ensuring that the tool name always matches the tool dimensions. It even supports displaying inch tools correctly. You can now view the chip load on the tool from within the software.
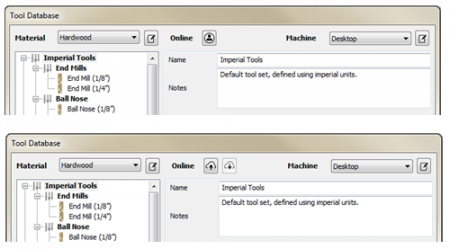
Online Tool Database
It is now easy to share your tool database across the machines you use. The new tool database can be synced with your online V&Co Account so that changes made to the tool database on one machine are reflected across your other running instances.
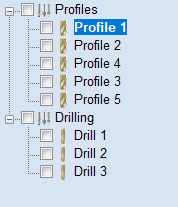
Toolpath Groups
Toolpaths can now be grouped within the toolpath tree. Organize your toolpaths into logical groups to make managing complex jobs more straightforward.
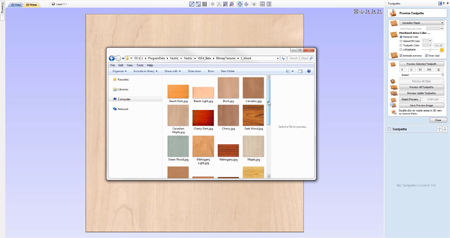
Material Importing
New material textures can be easily added to the software. If you have a picture of the material you want to add you can just select ‘add new texture’ from within the appearance drop down menu to use that image for the material texture.
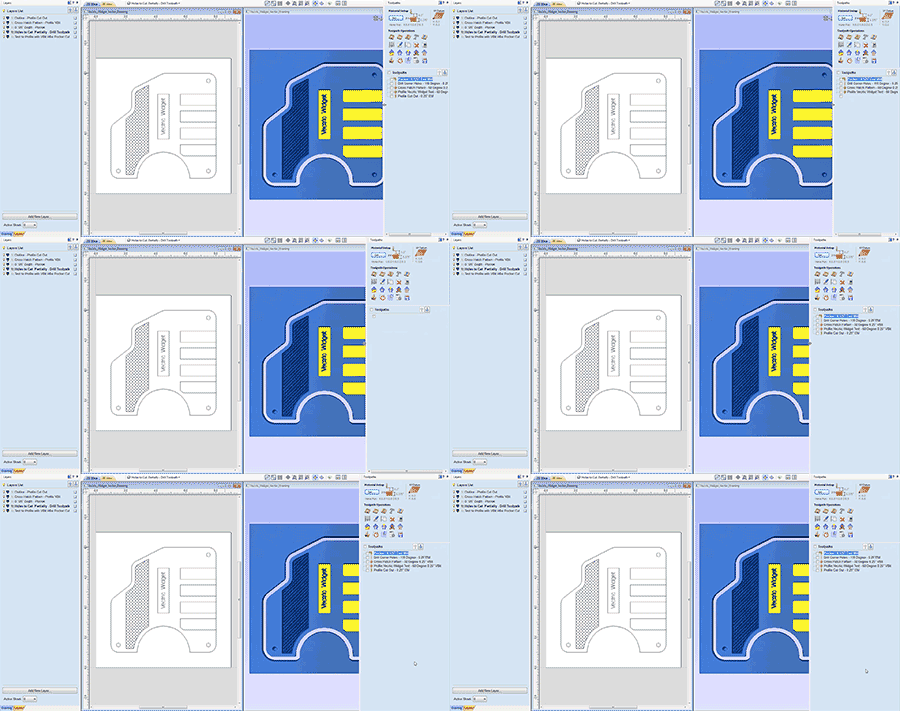
Tab Resizing
The toolpath tab is now resizable. Expand it to fit even the longest of toolpath names.
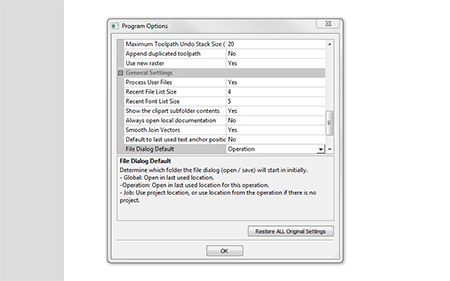
Default File Dialogs
You can now use different settings for default file locations. Choose to have the software remember specific locations for specific actions, e.g. always open images from my `pictures` directory. Or you could choose to always open the file dialogs in the folder of the current project.
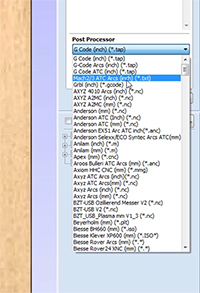
Post Processor List Favourites
When you save out toolpaths we have made it easier to locate your favourite posts where the post processor list will now save the 5 most recently used post processors at the top of the list allowing for quicker selection of frequently used posts!
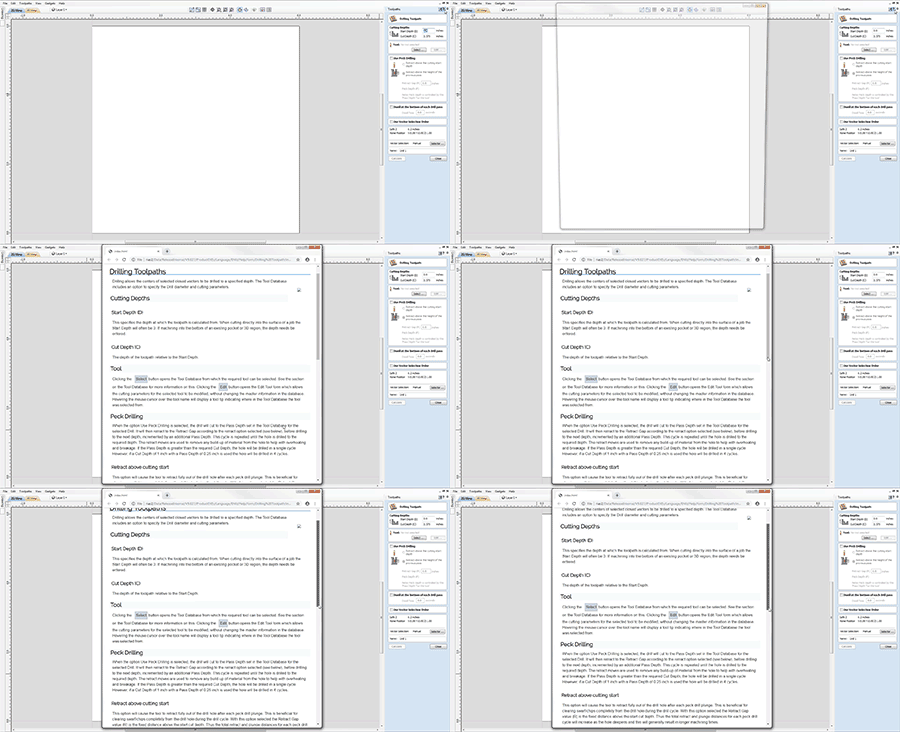
Integrated Help
Help for all forms can now be found using the integrated help function, which can be found if you click on the question mark icon on the top of each form to get the help for that specific function.
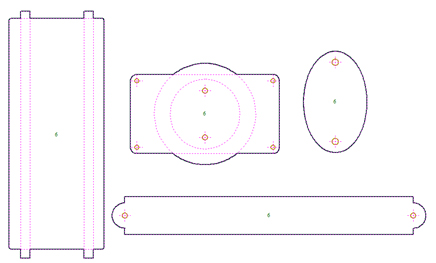
Nesting & Double-sided Nesting
When nesting parts it is easy to see what parts will be nested before applying the nest command. When you select your vectors for nesting, the software will indicate what it believes to be “parts” and you will see that represented by the thick black outline, any vectors that overlap an outer boundary will be included in the outline for the “part” and any vectors that lie inside the bounds of the outer vector will be highlighted with a brown colour (if the “allow parts inside other parts” option is checked) and this is to represent areas that the software identifies as “holes” in the work piece. With the addition of displaying the outer boundaries for parts to be nested these outlines will be used during the nesting process and so parts will be nested in a much more space efficient way. When working in a double-sided job the nesting form will automatically switch on the nest two sided parts option, allowing you to nest vectors on both sides of your material. Again the visual indicators are handy so that you are able to visualise whole parts where vectors overlap each other on both sides.
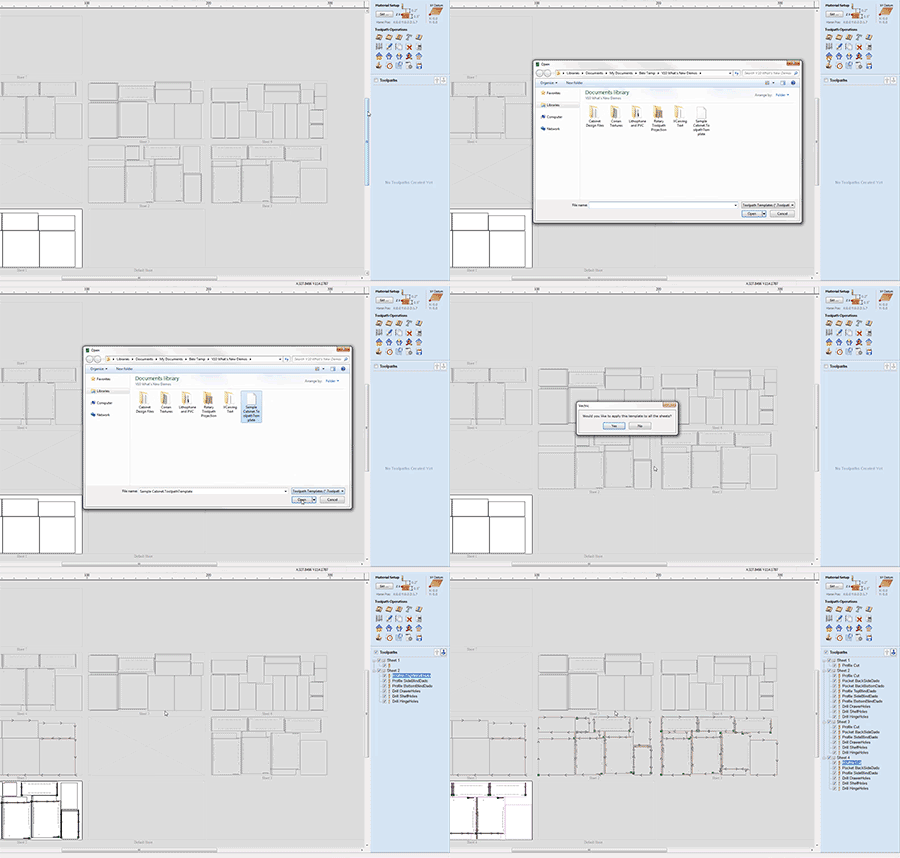
Apply Templates to All Sheets
Loading a template will now ask if you want to apply that template to every sheet in the job. Any toolpaths generated will be prefixed by their sheet number and grouped in the toolpath tree.

Toolpath Merging
Toolpath merging is a powerful tool for combining separate toolpaths into a single more efficient toolpath. It has been enhanced by allowing you to edit and modify all the original toolpaths whilst still maintaining the merging information. The operation now produces a parent toolpath and contains all original toolpaths as a sub toolpath. Each sub toolpath can be modified, and the merging is automatically updated.
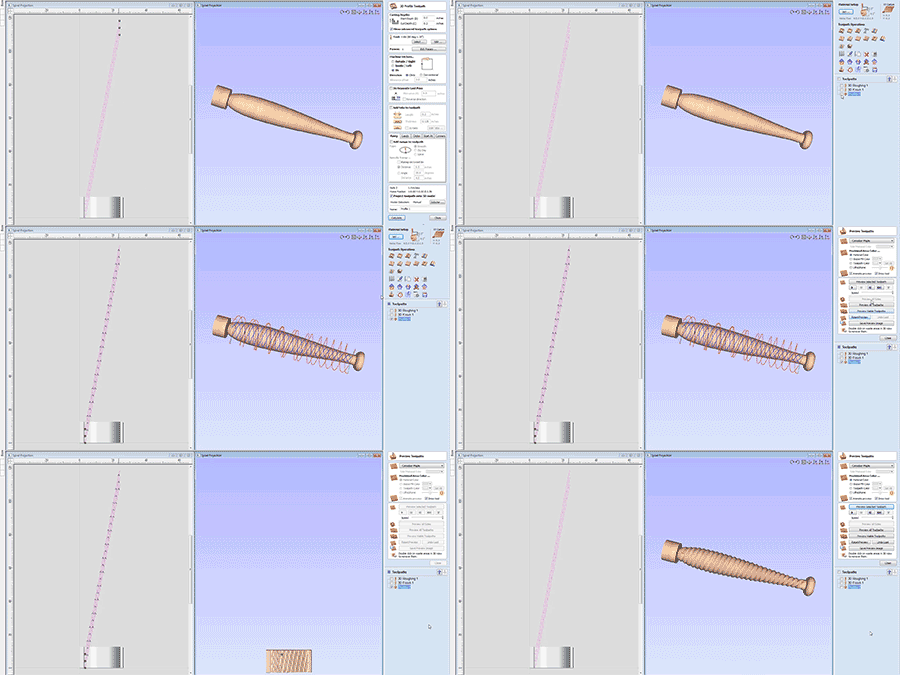
Rotary Toolpath Projection
Toolpaths in rotary jobs can now be projected even if they fall outside of the job. This allows for easier creation of spiral toolpaths.
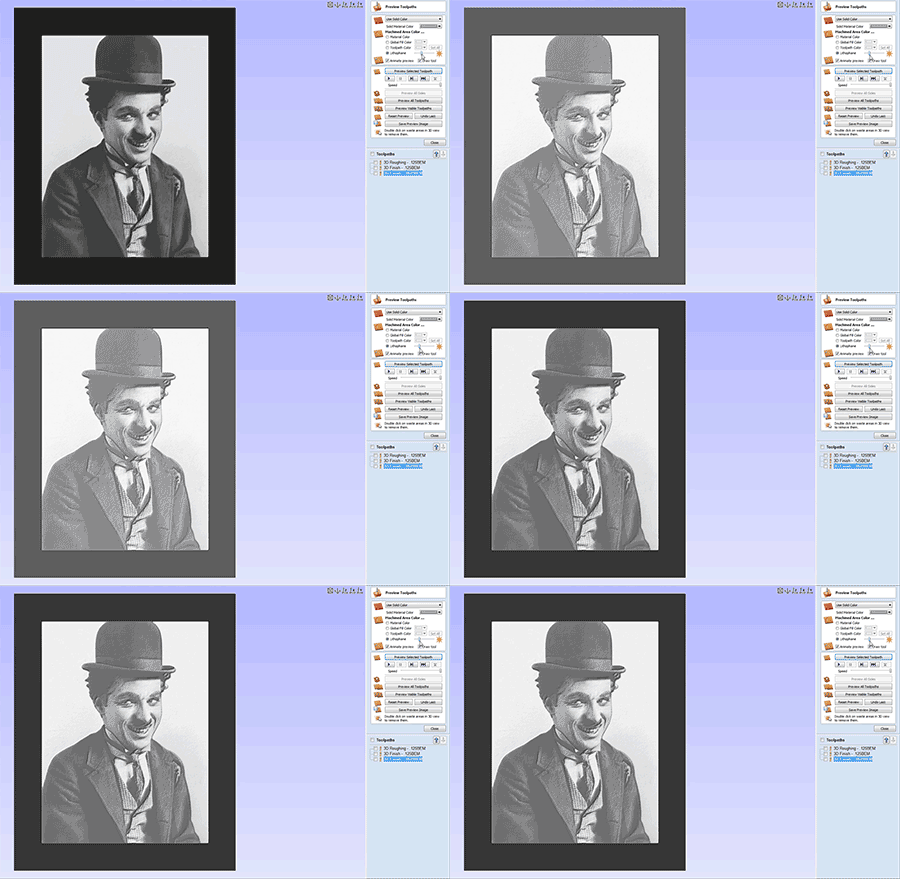
Lithophane Preview
The lithophane preview mode provides a simple way to visualize the lithophane effect on your simulated toolpaths. Just enable the mode from within the simulation and use the slider to adjust the brightness to suit.
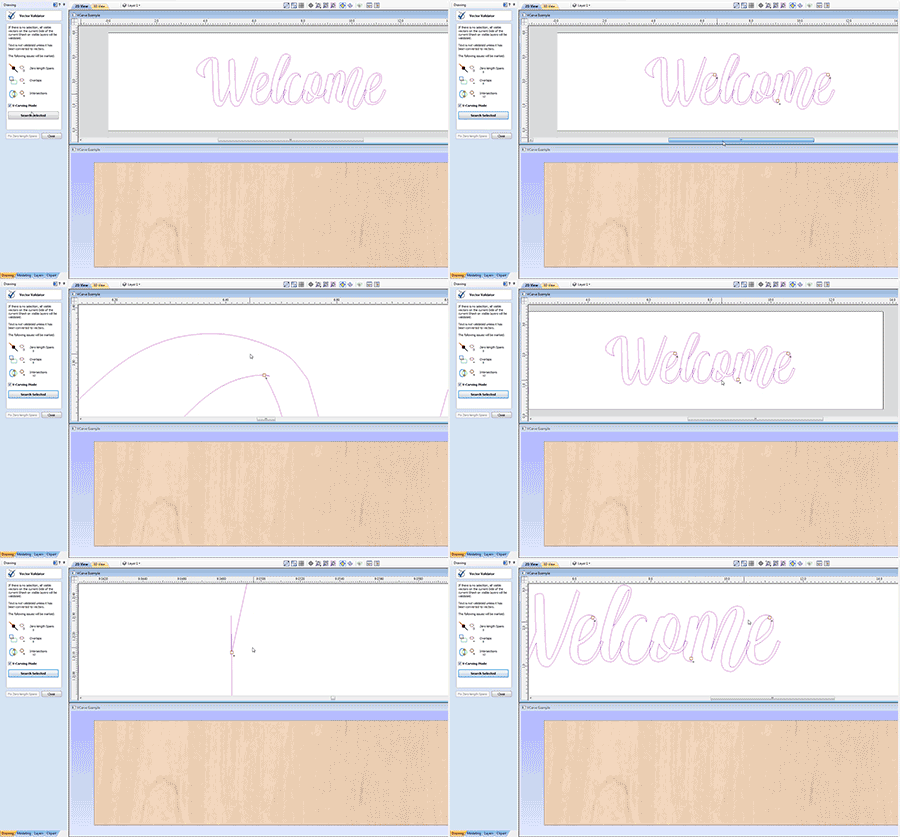
VCarving Text & Intersection Detection
Text is welded automatically with the Welding Tool before being V-Carved without it actually affecting the text object. Making the process quicker, this also avoids issues arising when characters intersect with each other. Another improvement that we have added to the VCarve Toolpath is the ability to detect and warn users about the presence of intersections within the selected vectors, where the software will prompt you on calculating the toolpath to run the Vector Validator to help locate problematic areas. Within the Vector Validator the software will automatically put you into VCarve mode where the software will ignore the intersections that would be welded by the toolpath itself. And focus on areas outside of the VCarving mode, helping you locate the issues before the toolpaths are simulated.

PhotoVCarving Toolpath Strategy
Use the PhotoVCarving toolpath strategy to convert photographs and images into toolpaths producing stylised engraved designs. The created toolpaths engrave a series of lines at different depths to produce the desired image.
